Weather API Example

Create an application that displays today's weather and tomorrow's forecast for a city using OpenWeather APIs.

Contact us if you would like to get access this application to your account.

Connect to the Current Weather API

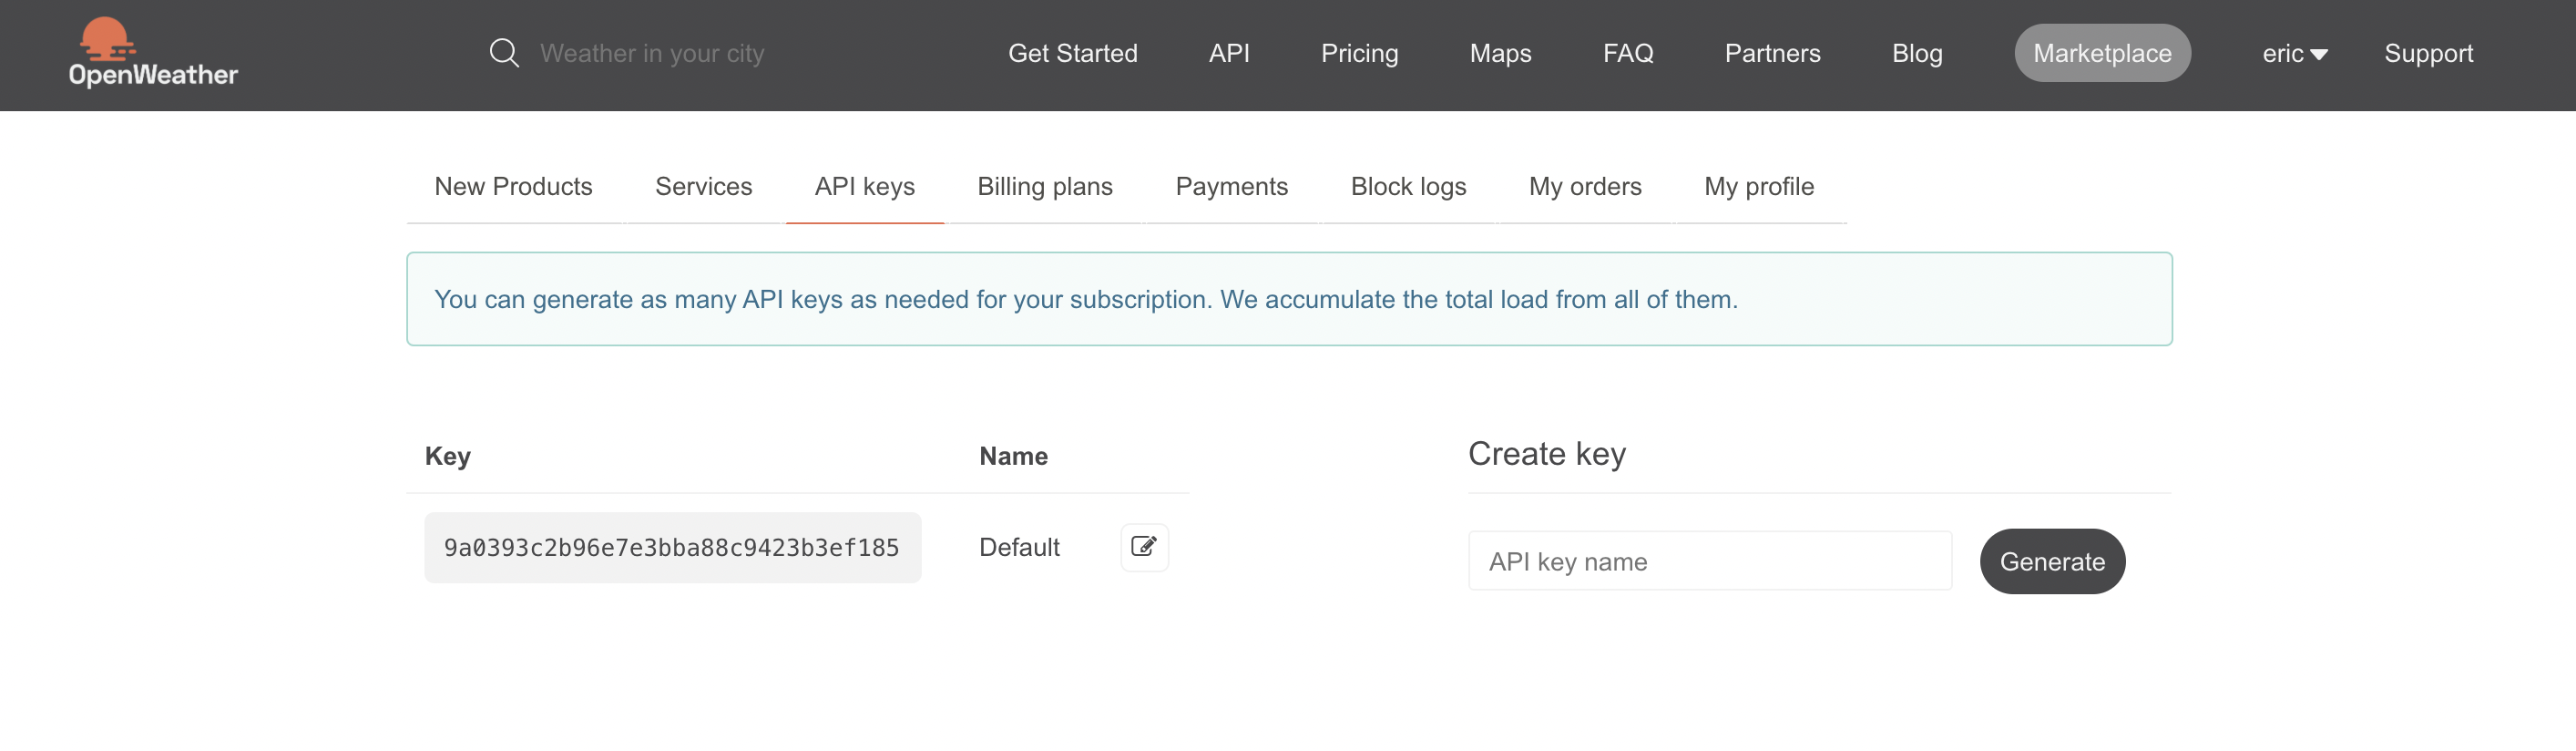
Create a free account on OpenWeather

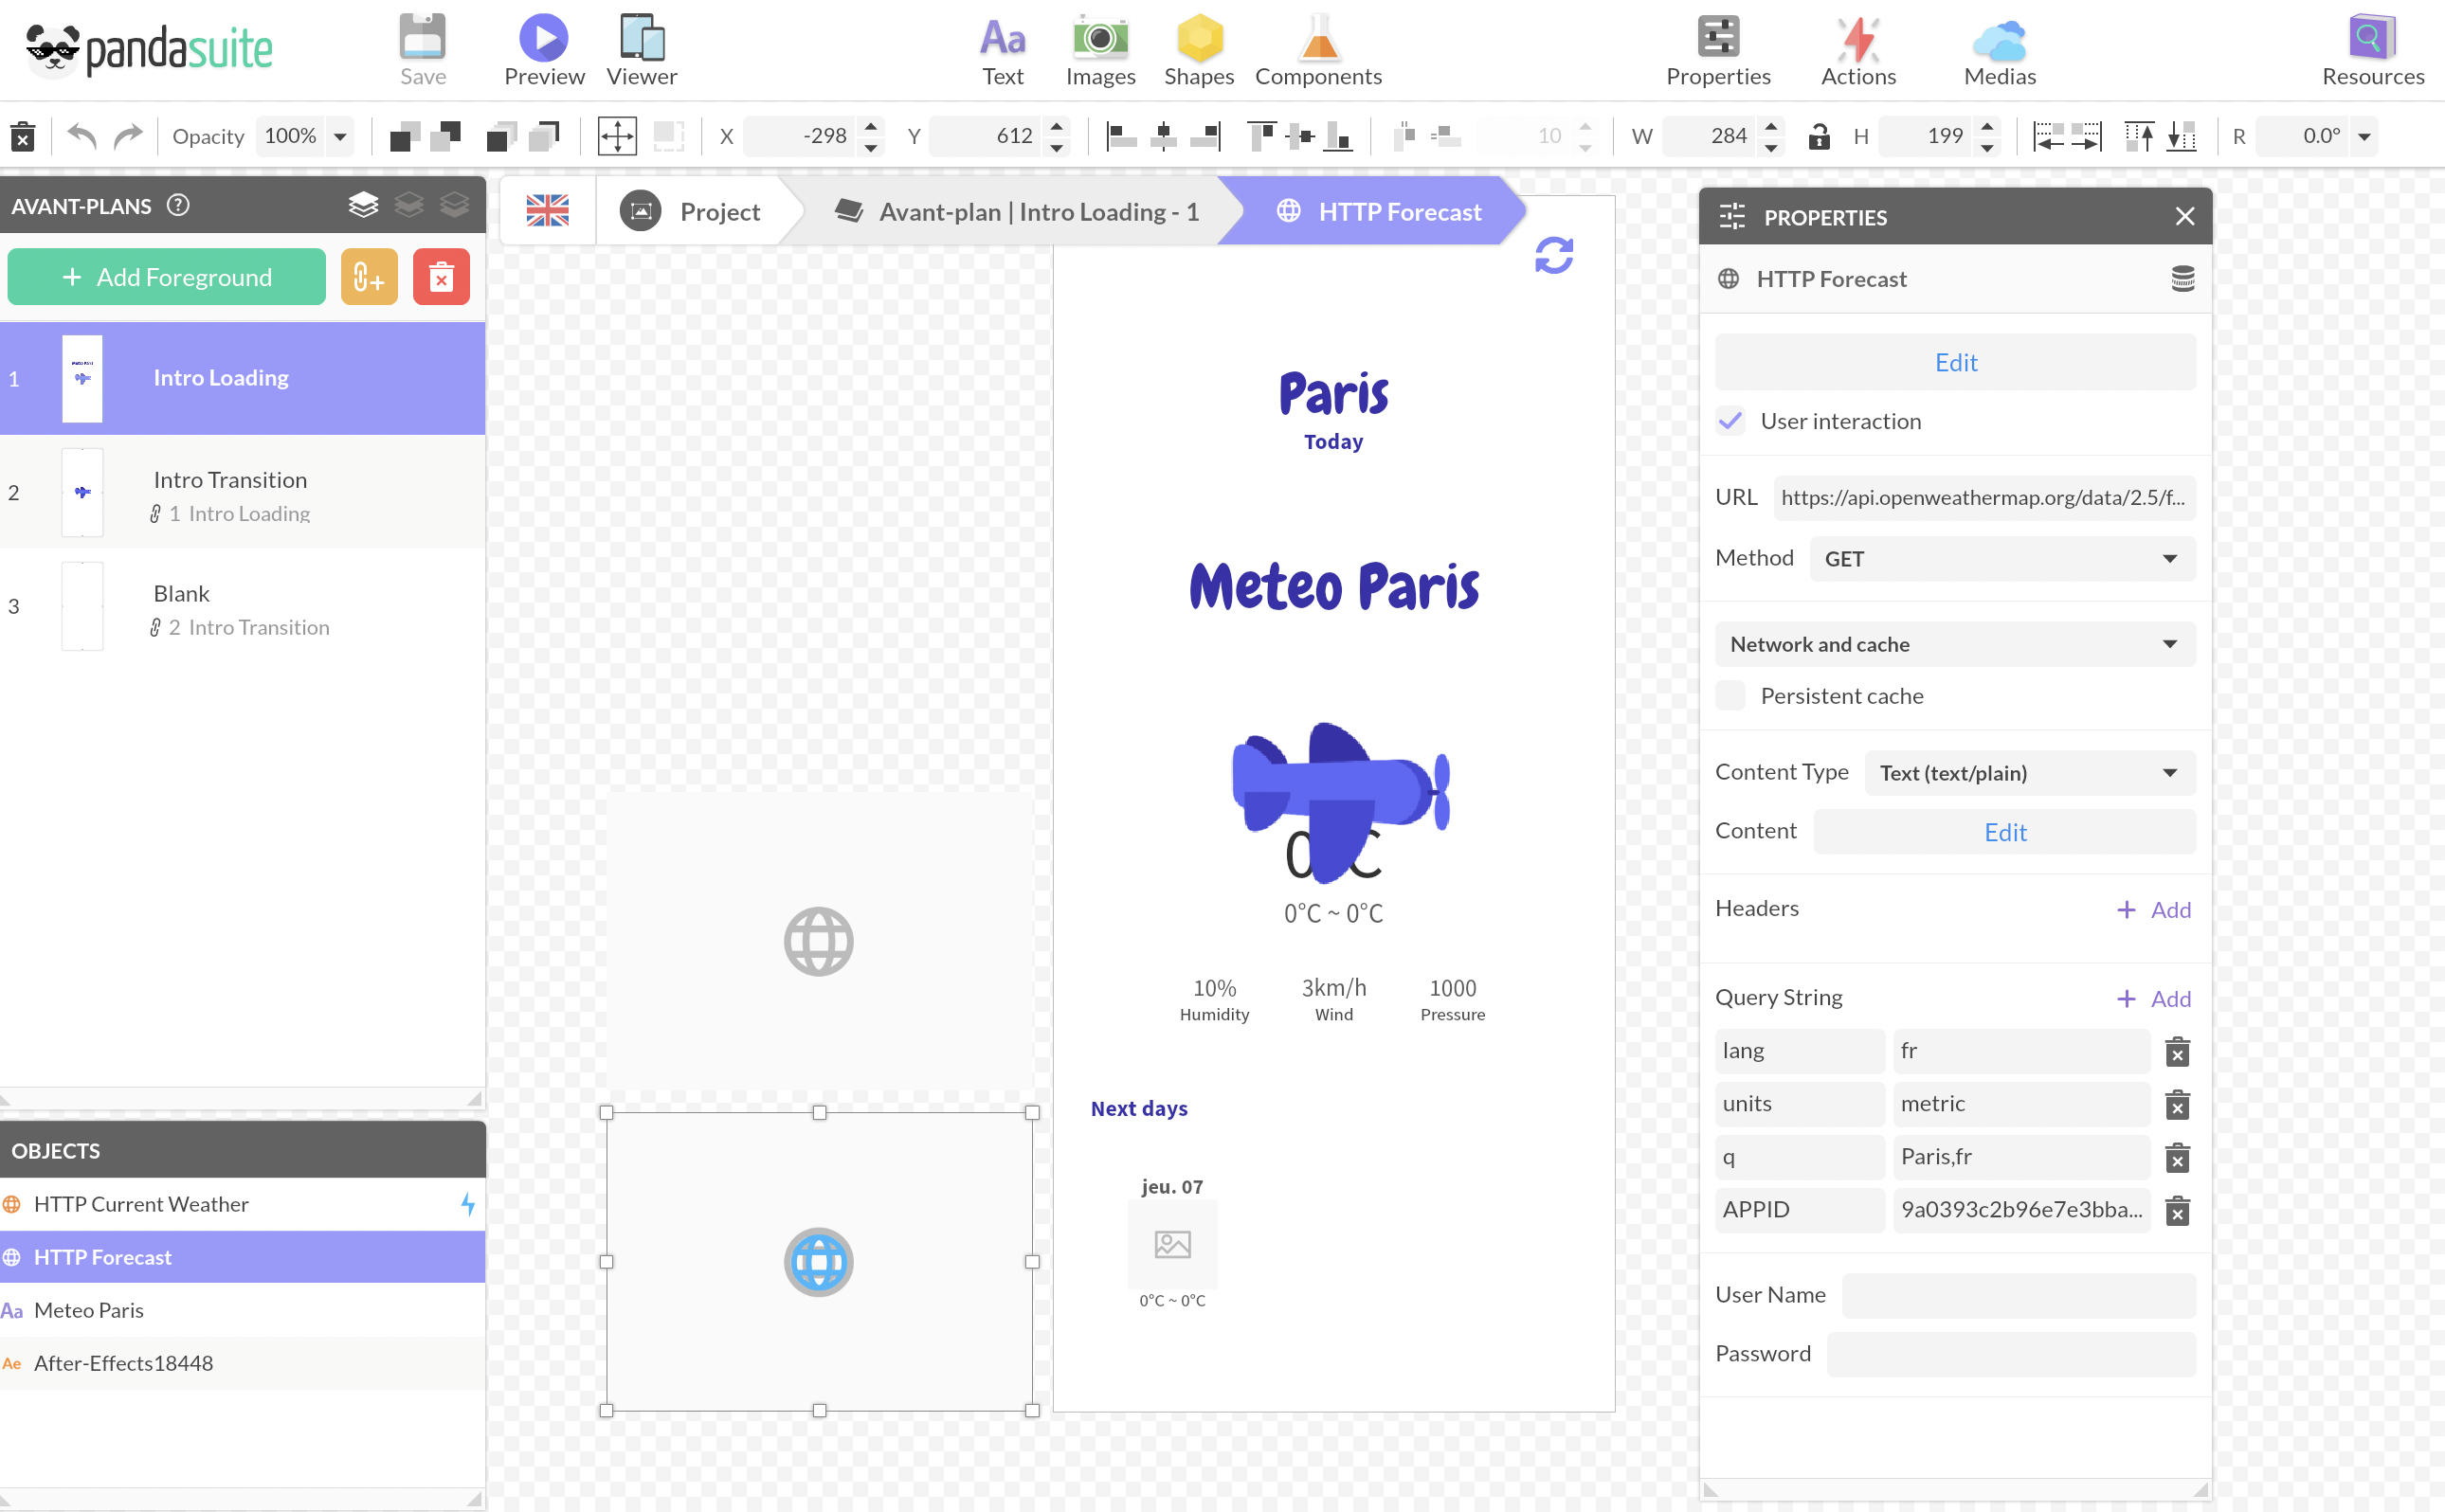
OpenWeather offers different APIs to get weather data from a location. First, we will look at the Current Weather API to get the weather of the day.

Go to the OpenWeather technical documentation for the reference URL of the Current Weather API:

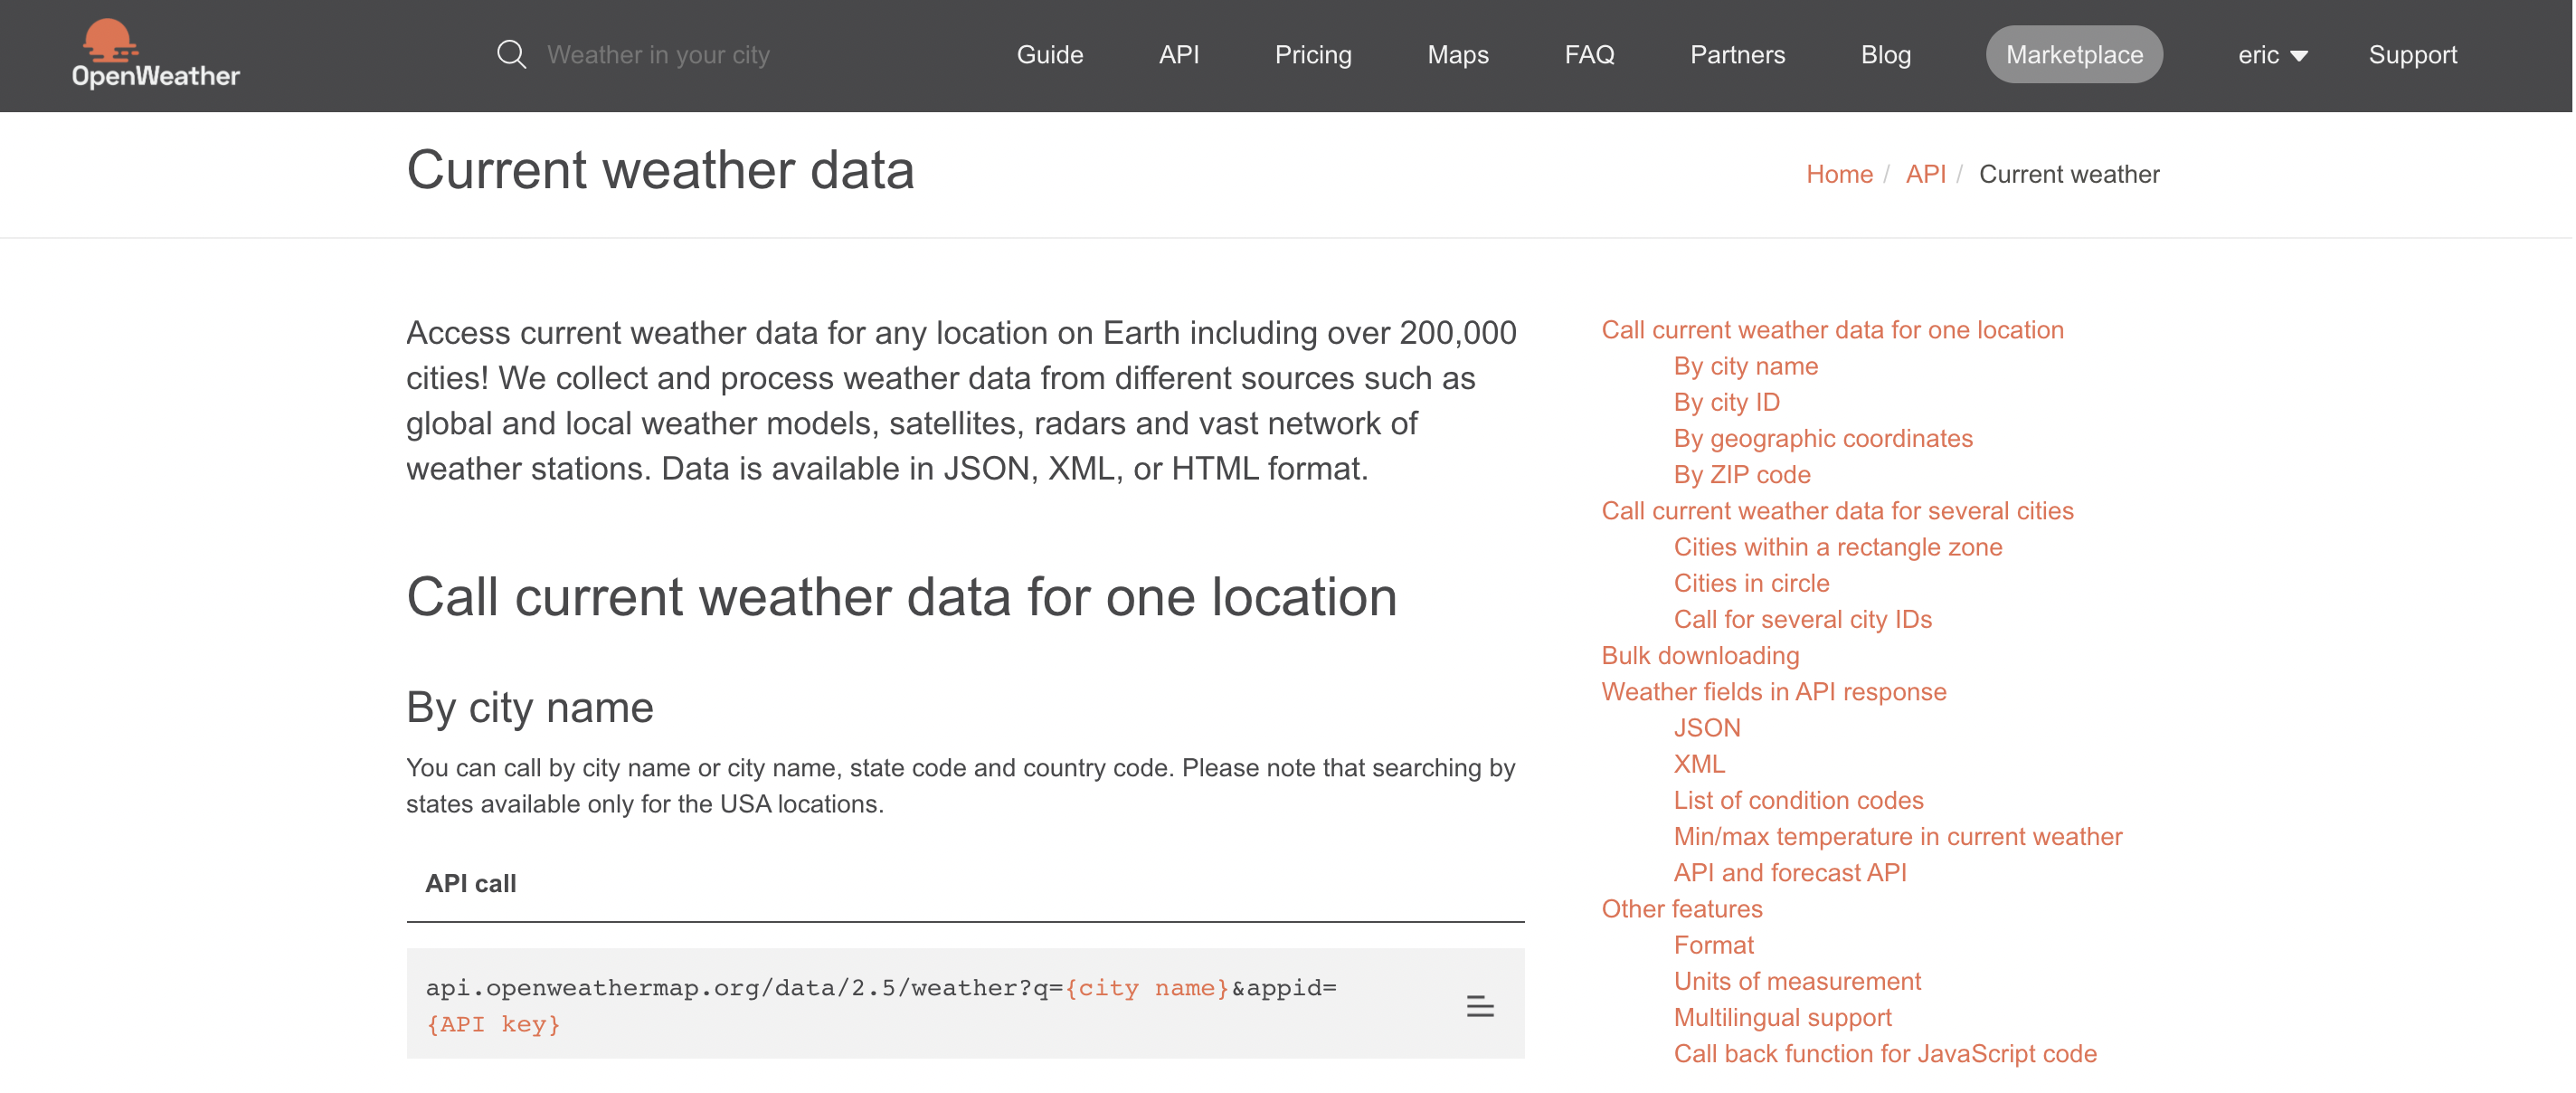
https://[api.openweathermap.org/data/2.5/weather?q={city name}&appid={API key}
Insert an HTTP component in the foreground so that it is available throughout the application.
In the Properties window, copy and paste the reference URL of the API (from https: to ? not included):
https://[api.openweathermap.org/data/2.5/weather

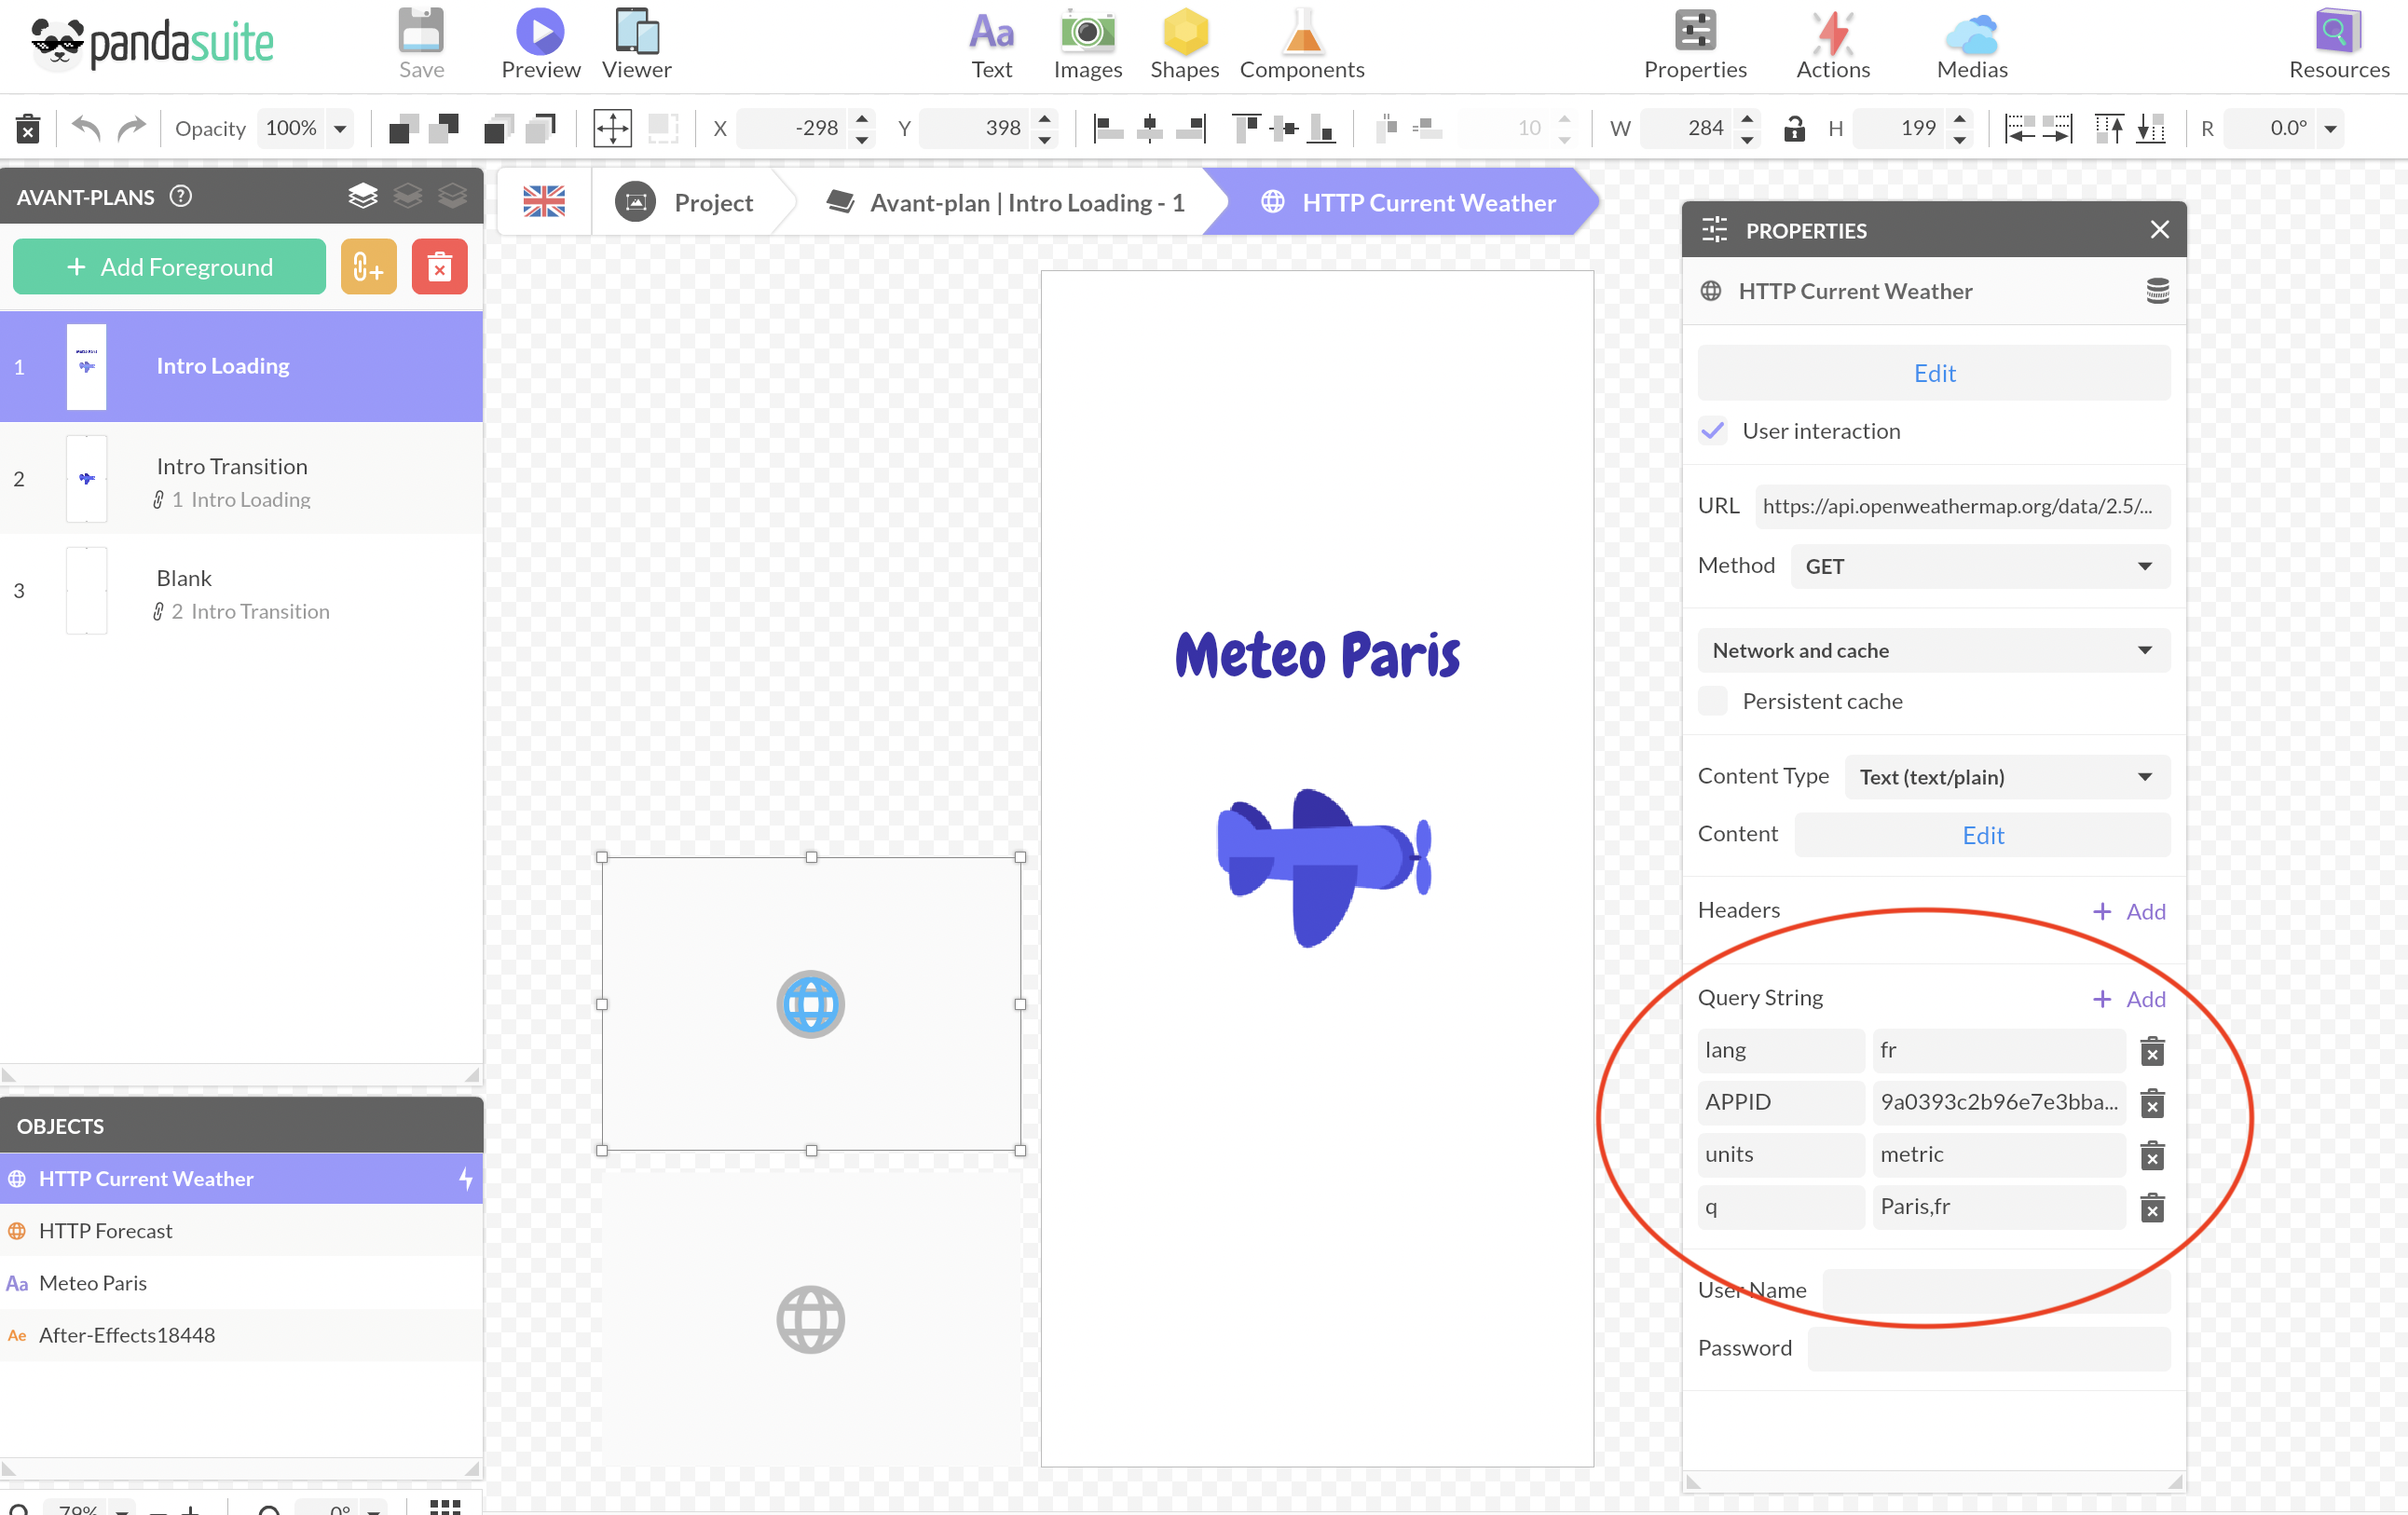
OpenWeather also provides you with Query strings that allow you to assign values to parameters in your API query: city (q), app ID (appid), unit of measure (units) and language (lang).

The app ID is the API Key, which is a unique identifier that you generate from the OpenWeather interface.

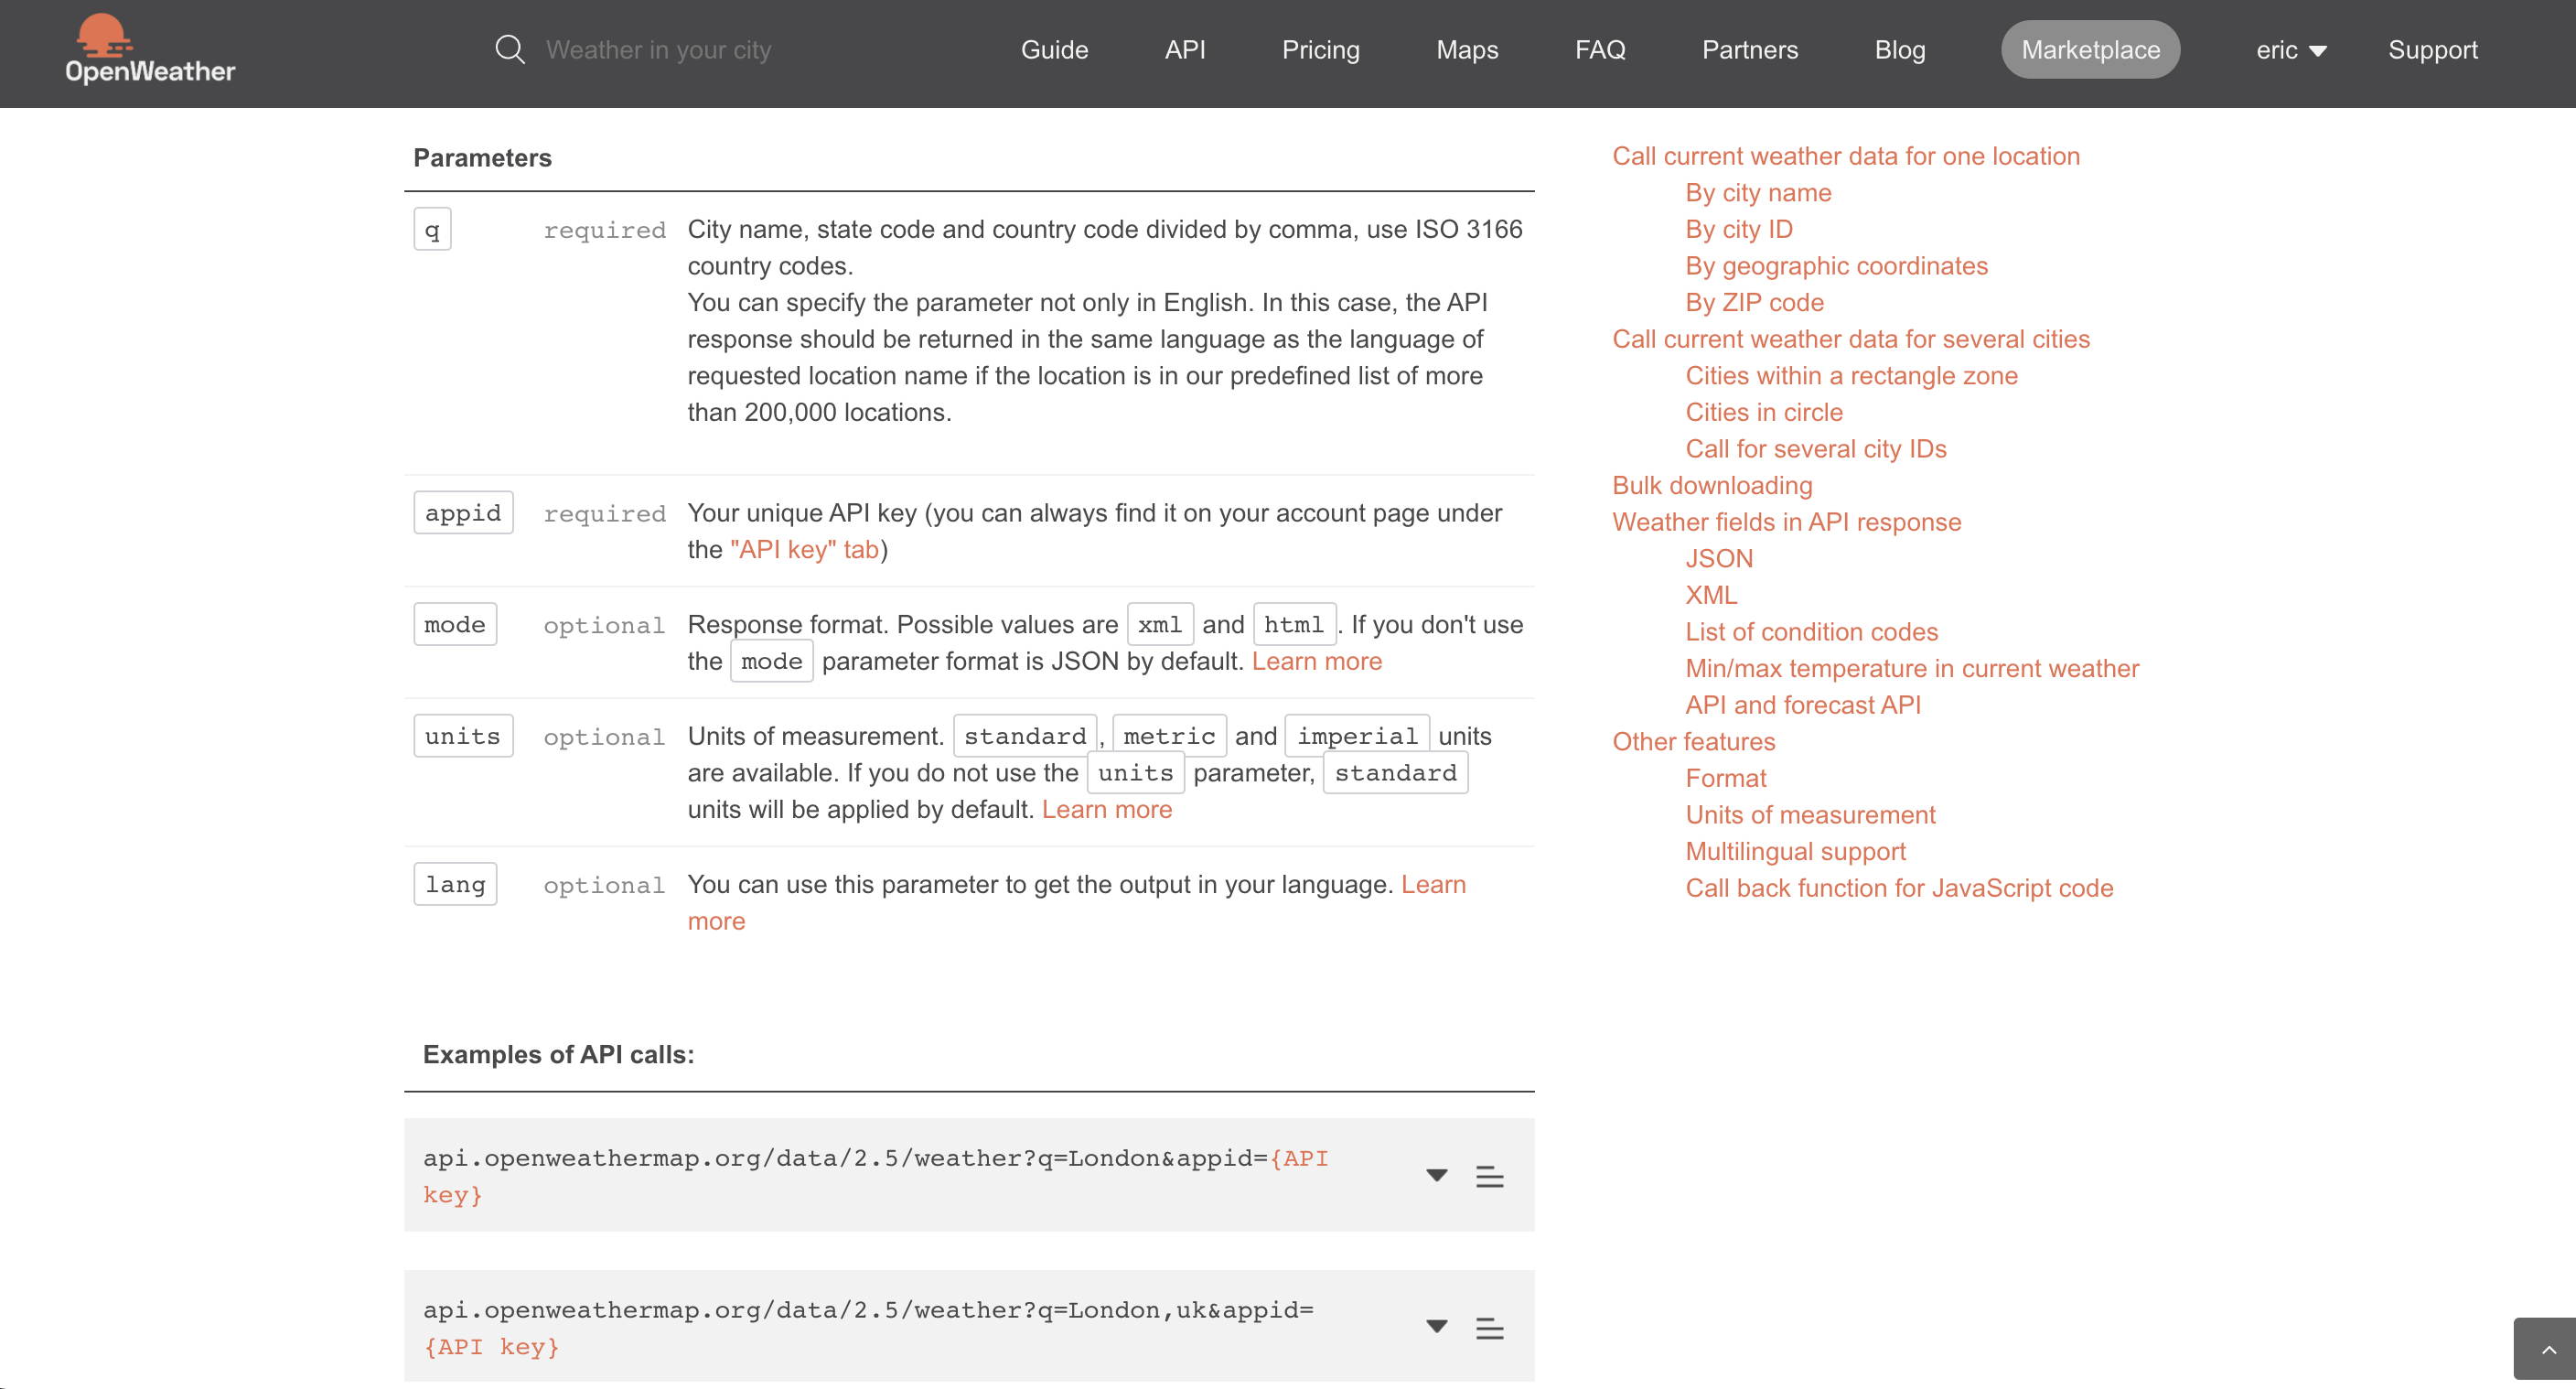
Add these settings in the HTTP Component Properties window. For our example we choose the French language (lang = fr) and the city of Paris (q = Paris,fr).

From the Properties window, you also have the ability to customize caching. Click Network and Cache to have the application return the contents of the cache, but still make the request to update it. This option allows you to get a quick response.
Choose the GET method to request data from the API.

Test the connection to the API

You need to test if your connection has been properly configured.
Click on the Edit button of the HTTP component (or double-click on the visible field of the HTTP component).
Information appears. Click the Test Request button.
Visualize the results of your request: if the raw data corresponds to your wish, the API has been correctly configured.
Here is an example of an answer from this API:
{
  "coord": {
    "lon": -122.08,
    "lat": 37.39
  },
  "weather": [
    {
      "id": 800,
      "main": "Clear",
      "description": "clear sky",
      "icon": "01d"
    }
  ],
  "base": "stations",
  "main": {
    "temp": 282.55,
    "feels_like": 281.86,
    "temp_min": 280.37,
    "temp_max": 284.26,
    "pressure": 1023,
    "humidity": 100
  },
  "visibility": 16093,
  "wind": {
    "speed": 1.5,
    "deg": 350
  },
  "clouds": {
    "all": 1
  },
  "dt": 1560350645,
  "sys": {
    "type": 1,
    "id": 5122,
    "message": 0.0139,
    "country": "US",
    "sunrise": 1560343627,
    "sunset": 1560396563
  },
  "timezone": -25200,
  "id": 420006353,
  "name": "Mountain View",
  "cod": 200
  }                         
 

It allows you to better understand the data structure and to formalize the right formulas.

Récupérer l'identifiant

The HTTP component identifier is essential to connect your component and API to another PandaSuite component, for example a collection (for weather forecasts).
To retrieve the identifier, double-click on the name.
Paste in a text field and retrieve the identifier.
For example :
HTTP -> 5f903e615ccbd73fda000453

5f903e615ccbd73fda000453 is the identifier of this component. 
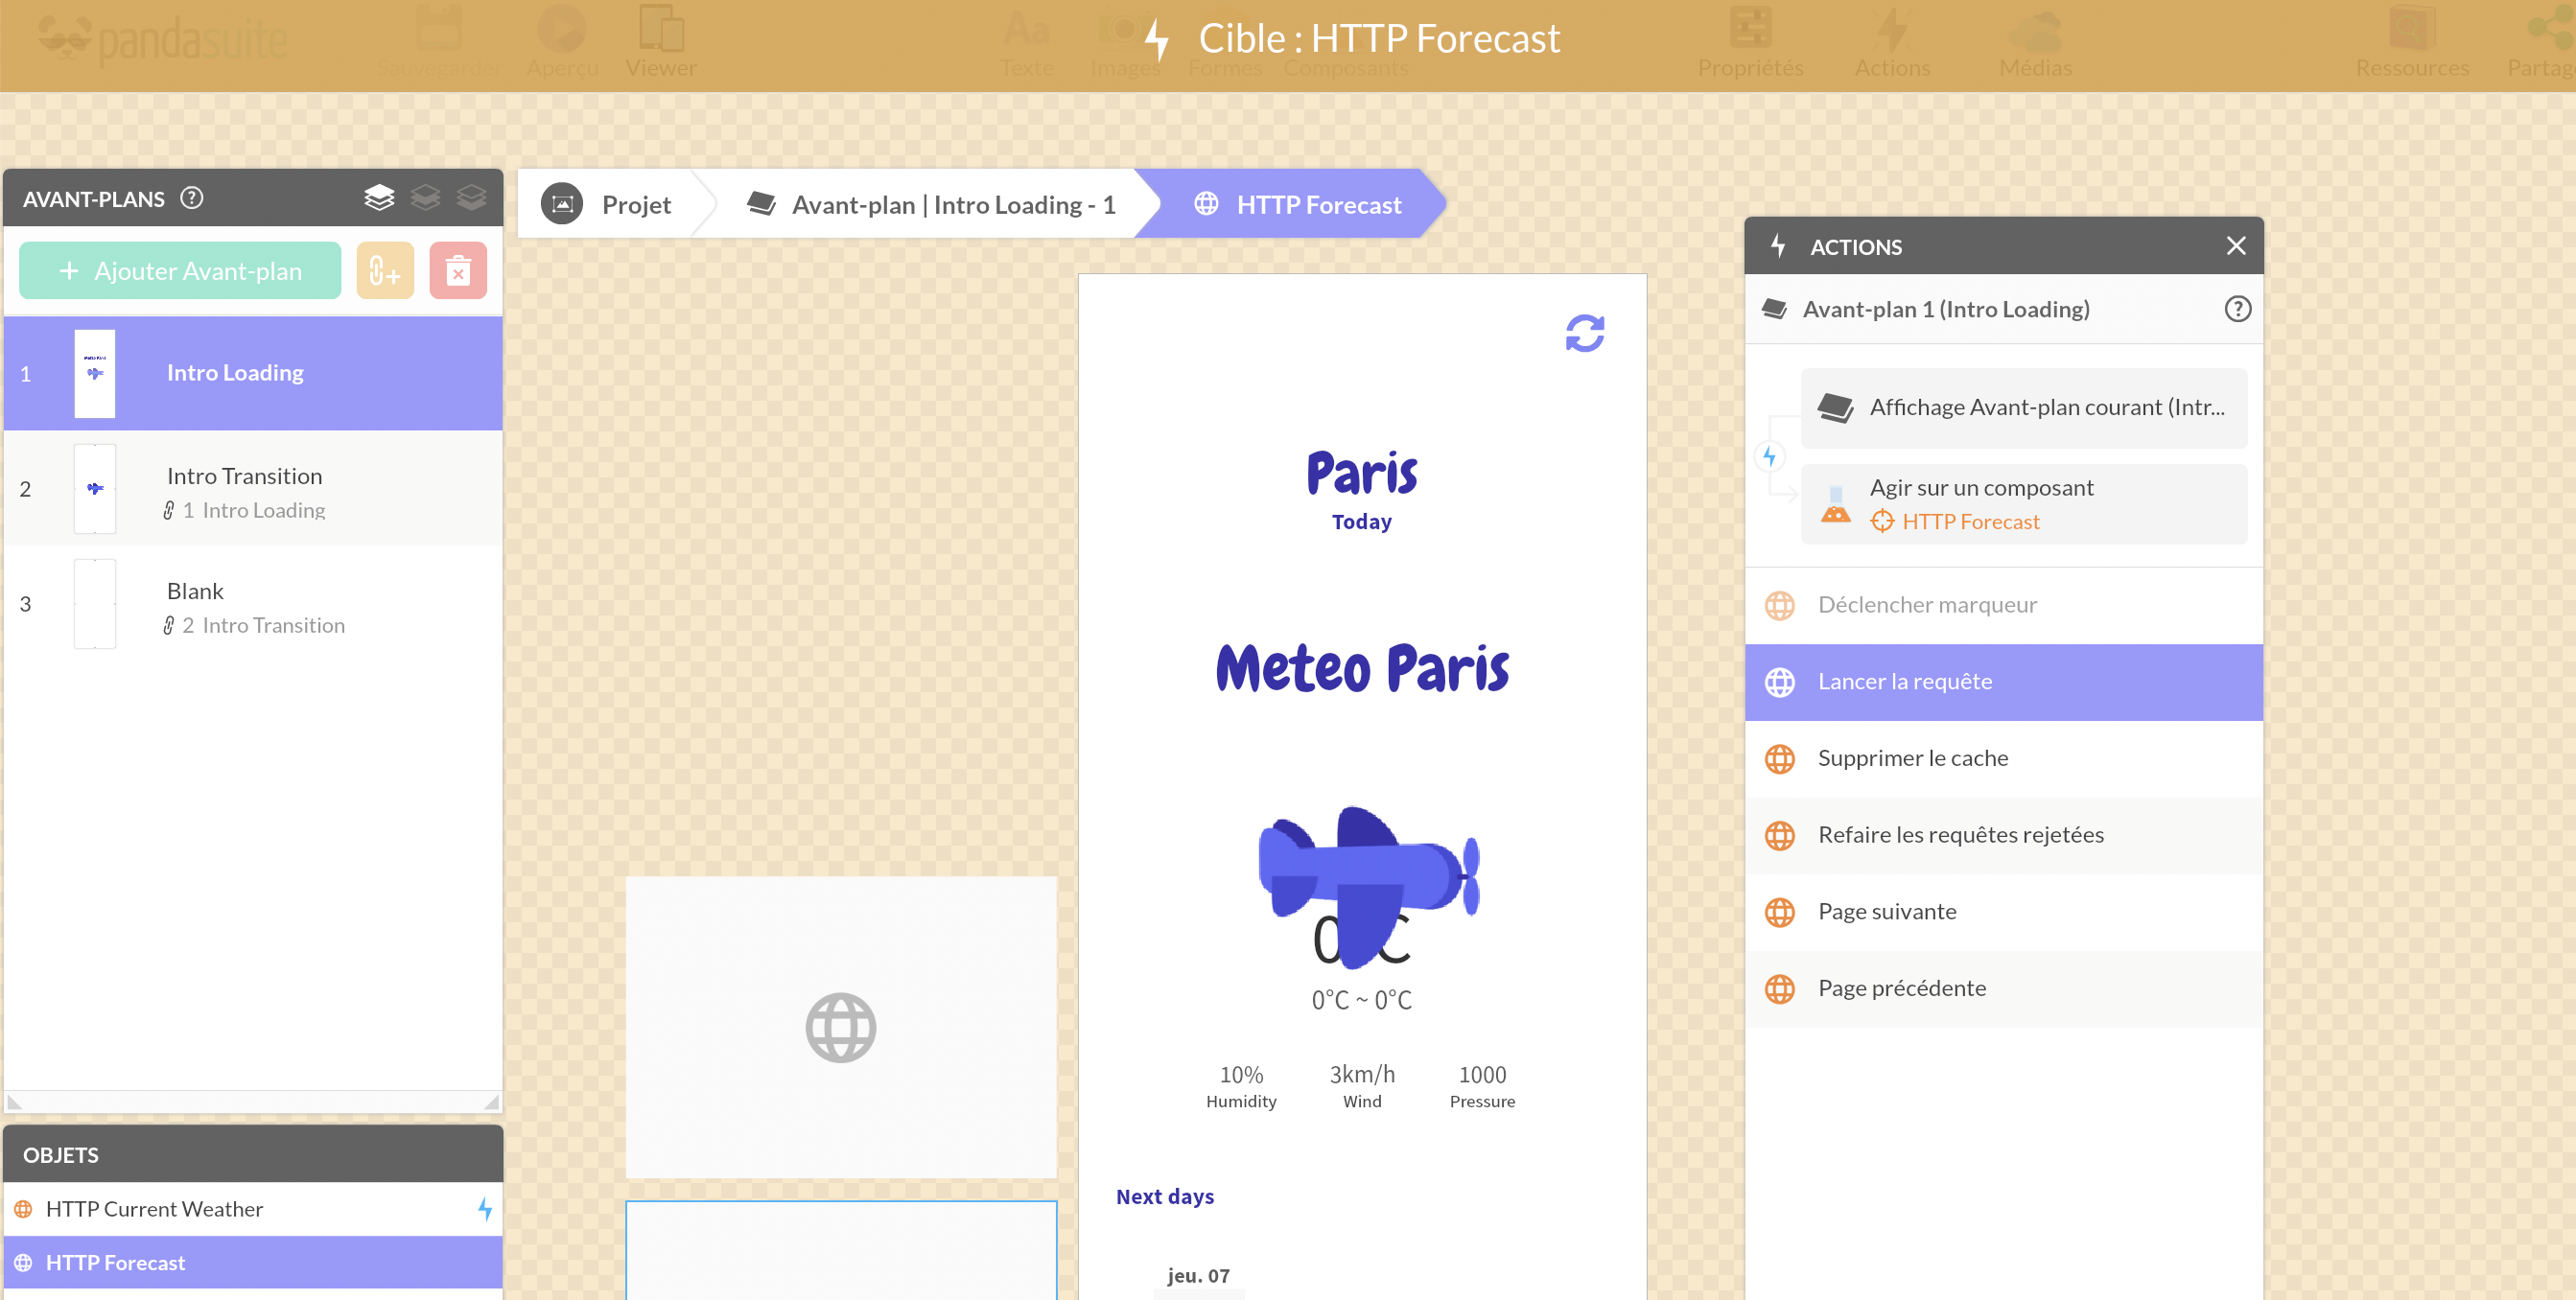
Start request

You need to create the API request action from your application. To make it happen automatically, we choose to do it in the foreground display.
Select the foreground, the Current View trigger and click Actions.
Select Current View > Interact with a Component > HTTP Component > Start Request.

https://d33v4339jhl8k0.cloudfront.net/docs/assets/5eeb6c752c7d3a10cba92698/images/5ffb02cdbb5c6f7434e0f605/file-BD90VY2u54.png

Connect the data

Display the temperature of the day

Create a screen and prepare the temperature design.
In our case, we choose to place a block of text in the center of the screen.
Then we need to connect the text to the data source, i.e. the PLC.
In the Properties window, click on the dynamic data icon in the upper right corner and the Add button.

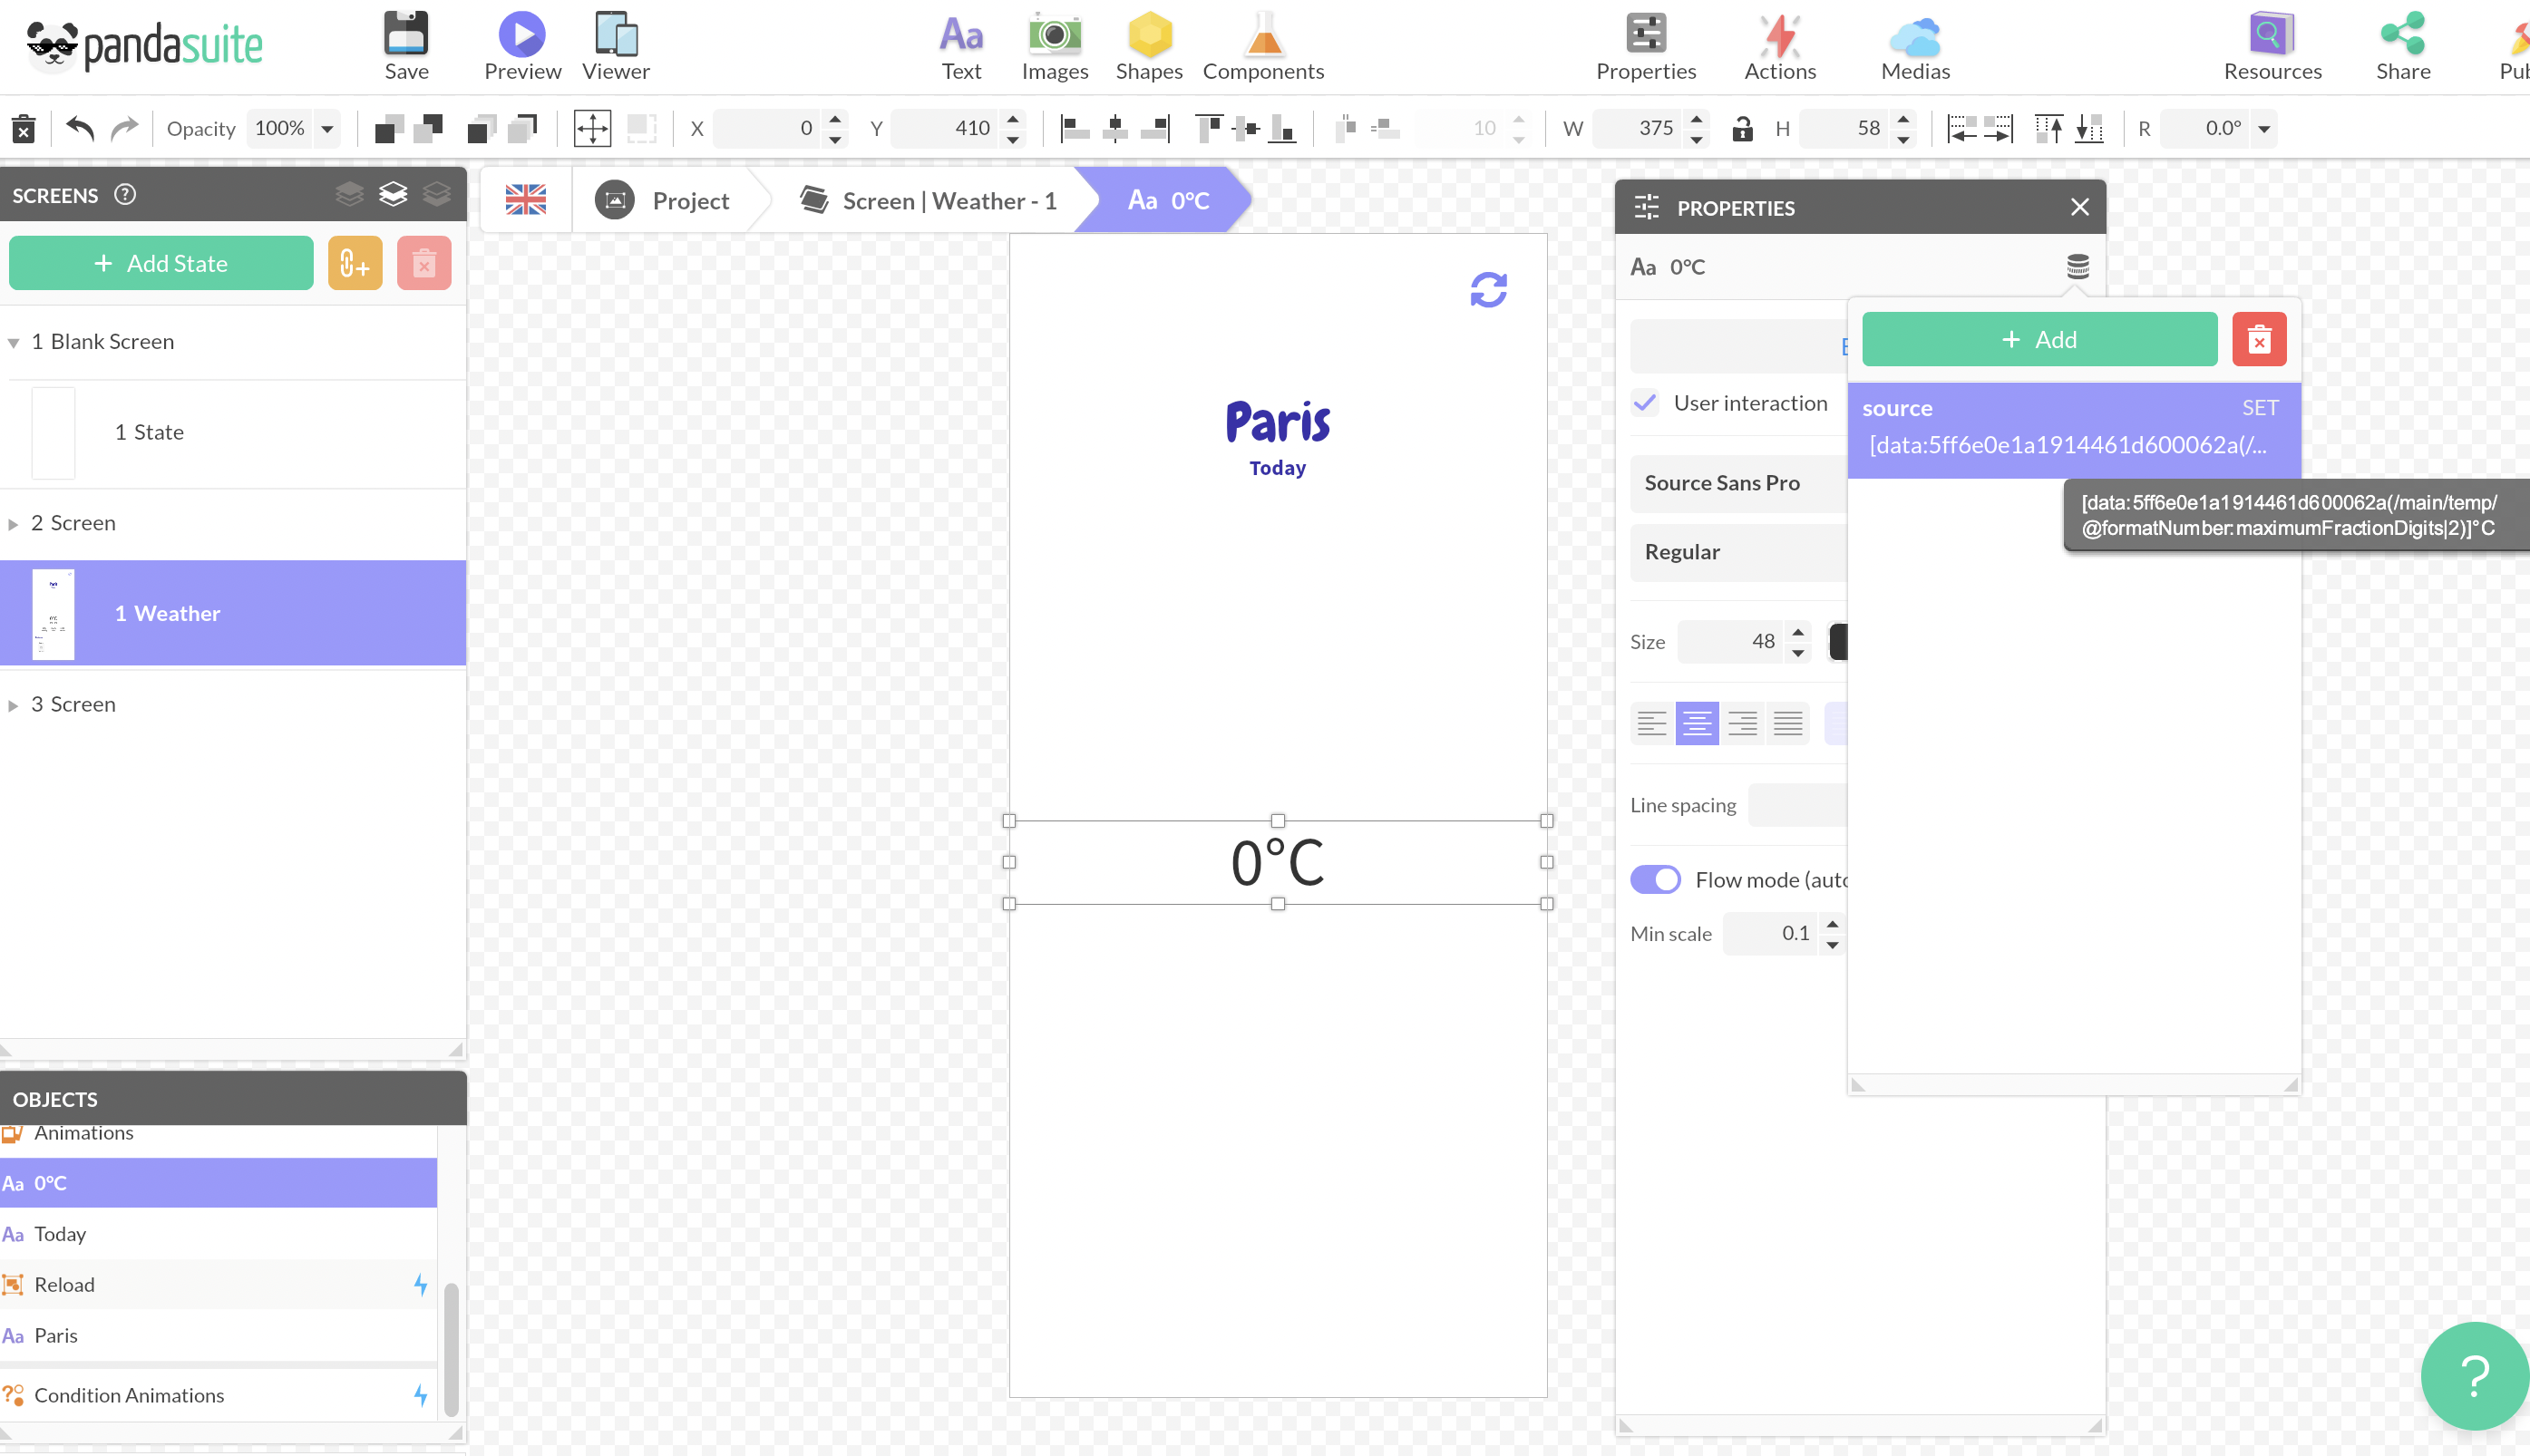
Copy and paste this formula:

data:5ff6e0e1a1914461d600062a(/main/temp/@formatNumber:maximumFractionDigits|2)]°C
5ff6e0e1a1914461d600062a is the identifier of your HTTP component.
main/temp is the way to access the temperature value
@formatNumber allows you to display a number naturally depending on the language of the project.

To learn more about the functions, read this tutorial.

Display the weather of the day (using Conditions)

OpenWeather provides daily weather information from its API using the icon field. This icon field has different values (01d, 02d, 10n etc...) corresponding to different weather situations: clear sky, few clouds, scattered clouds...
For example 10n is associated with light rain.

To visually represent the day's weather, we inserted a series of After Effects animations in a Gallery component. One animation per value.

You must now create the action of displaying the right animation according to the value reported by the API.
Insert a Conditions component.
In the Properties window, create a condition for each value:
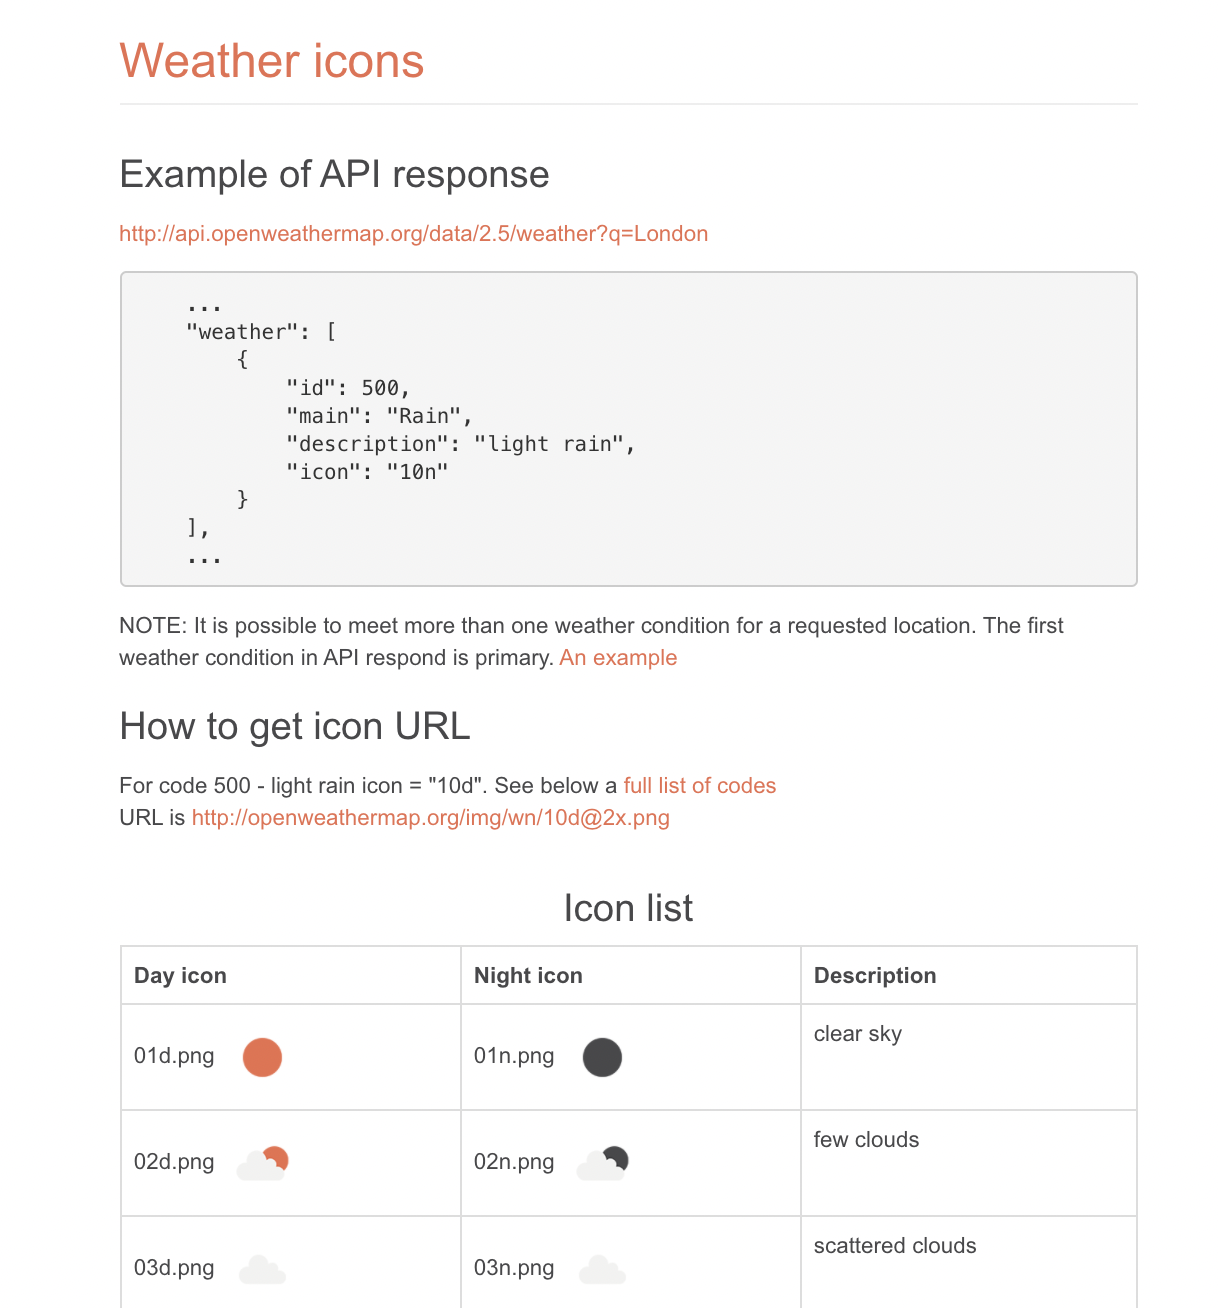
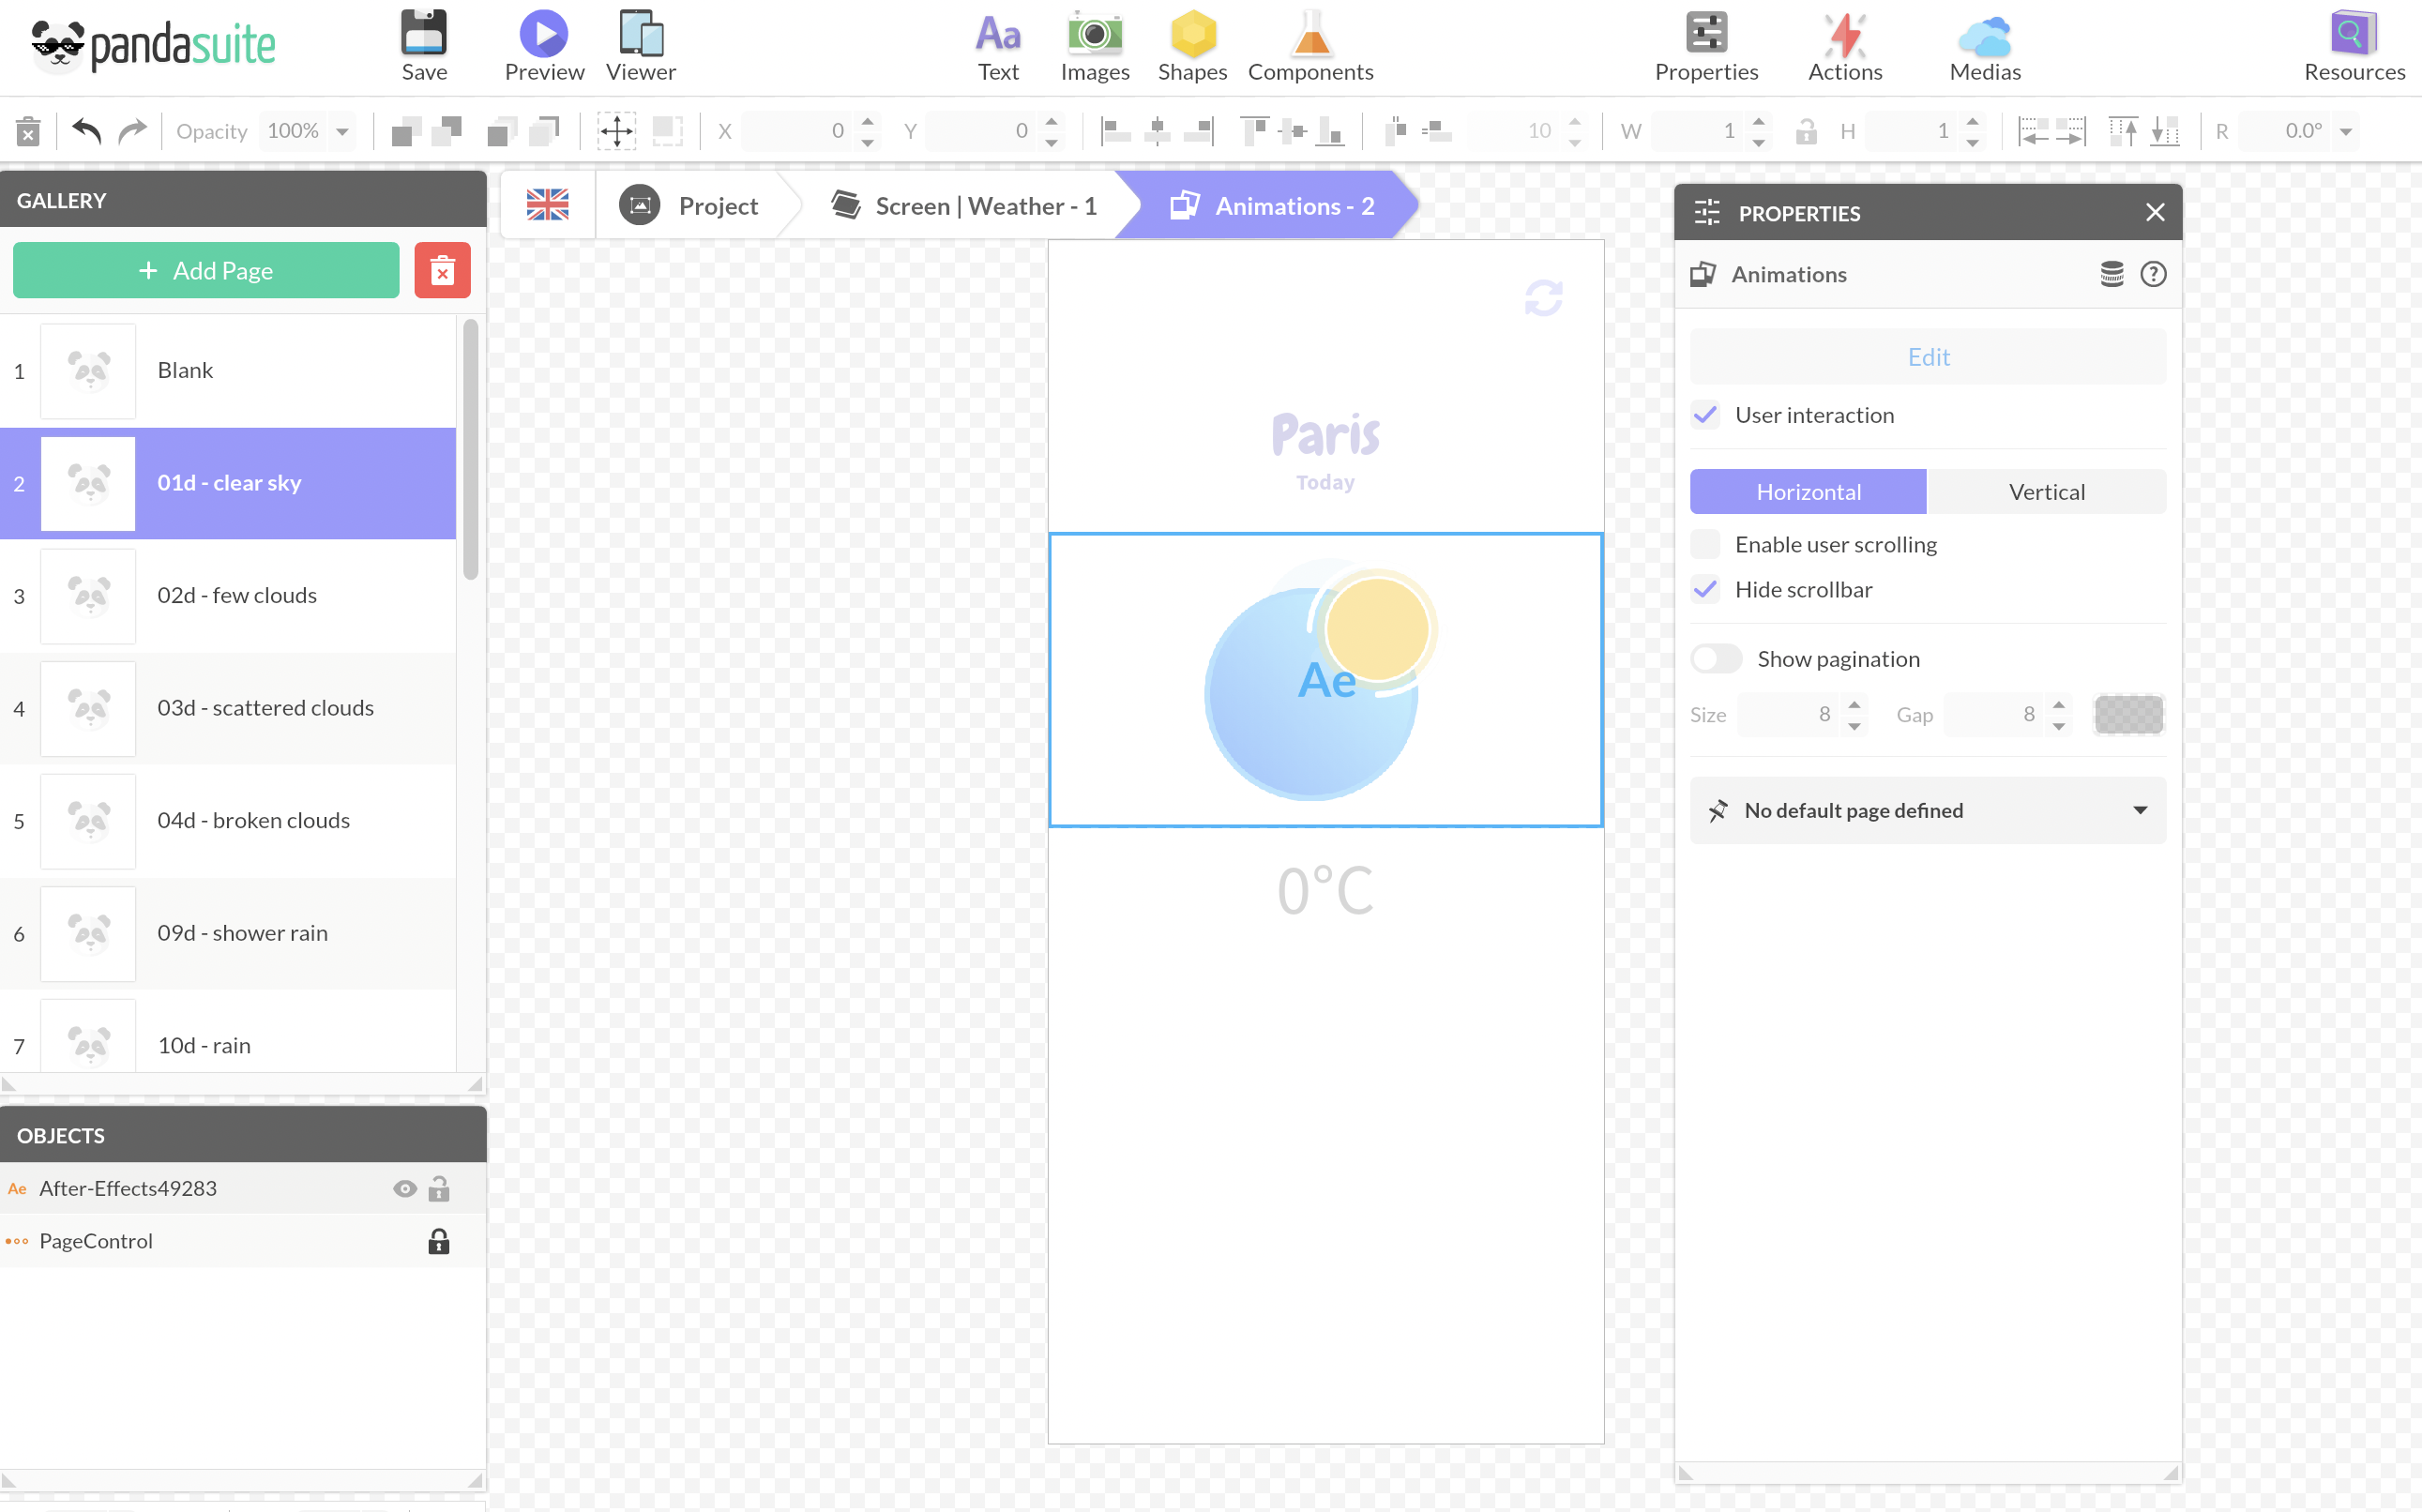
Data: [data:5ff6e0e1a1914461d600062a(/weather/0/icon)]
Function: Equal to
Value: 01d
Rename each condition with the name of the value, e.g. 01d.
Check the Auto. evaluatio n box.

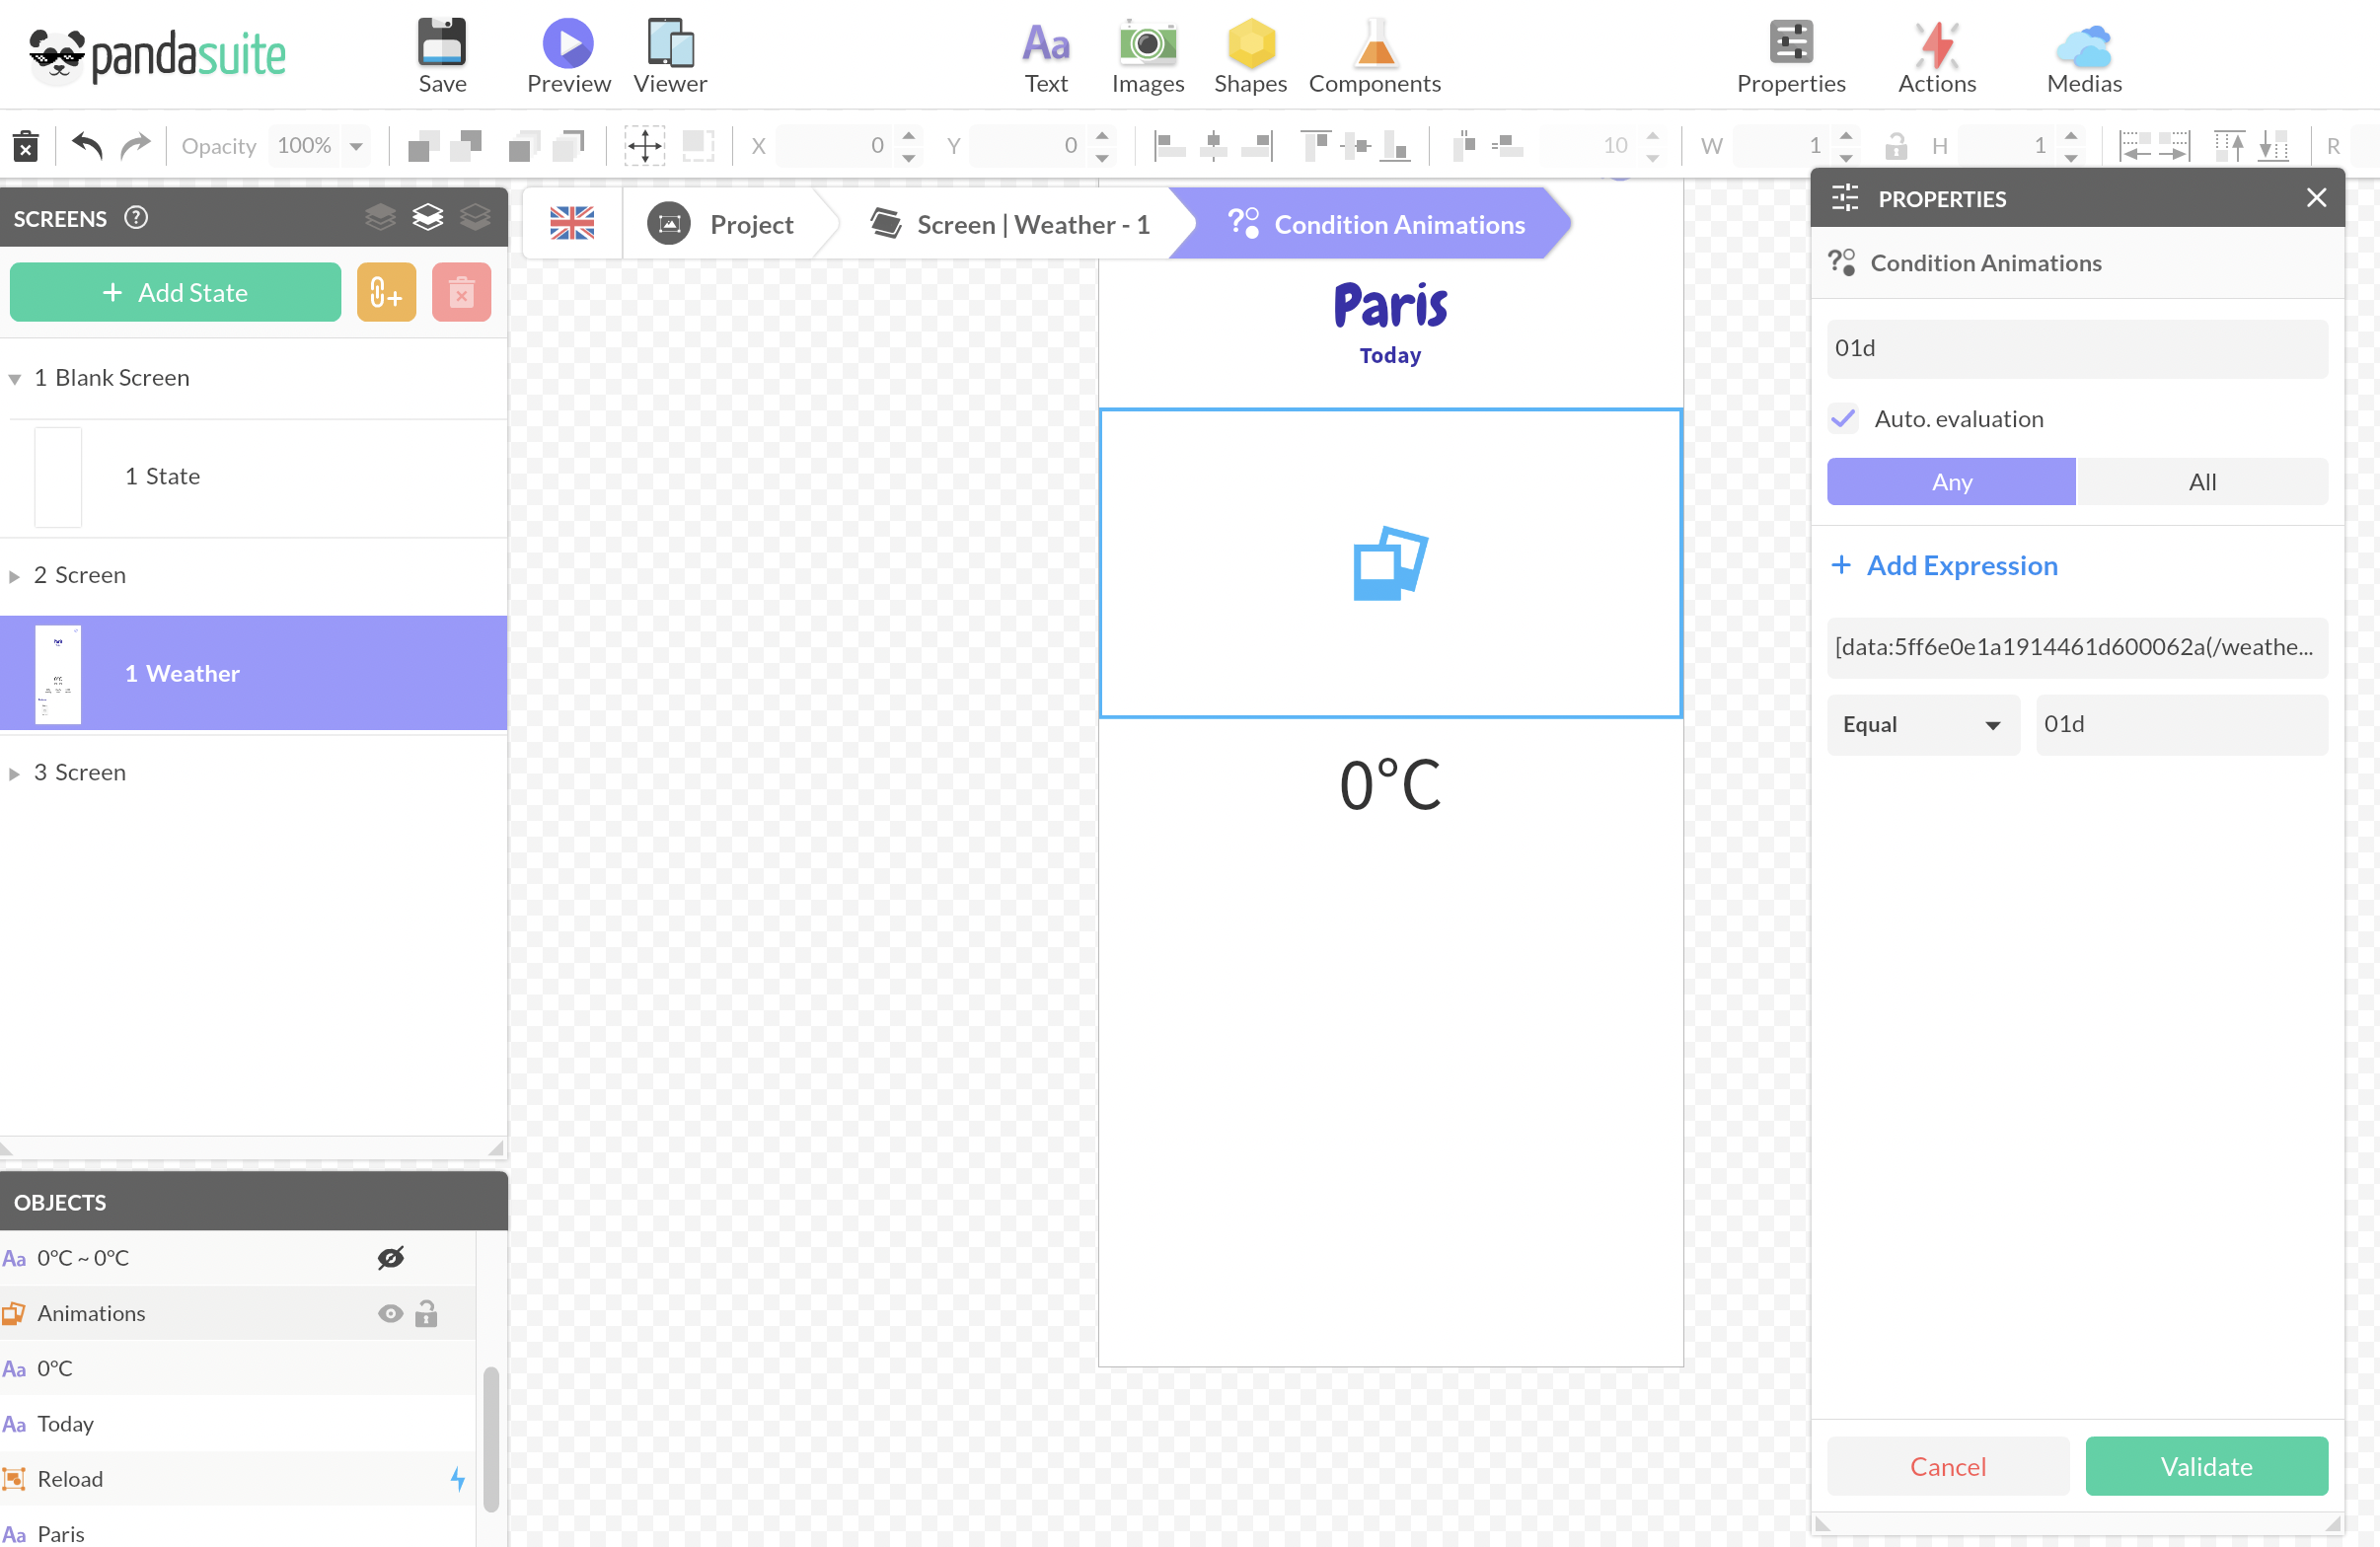
Select the Conditions component and create the action at the Evaluation (01d) trigger  > Interact with a component > Gallery > Go to selected page (01d) .

Display weather forecast (collection)

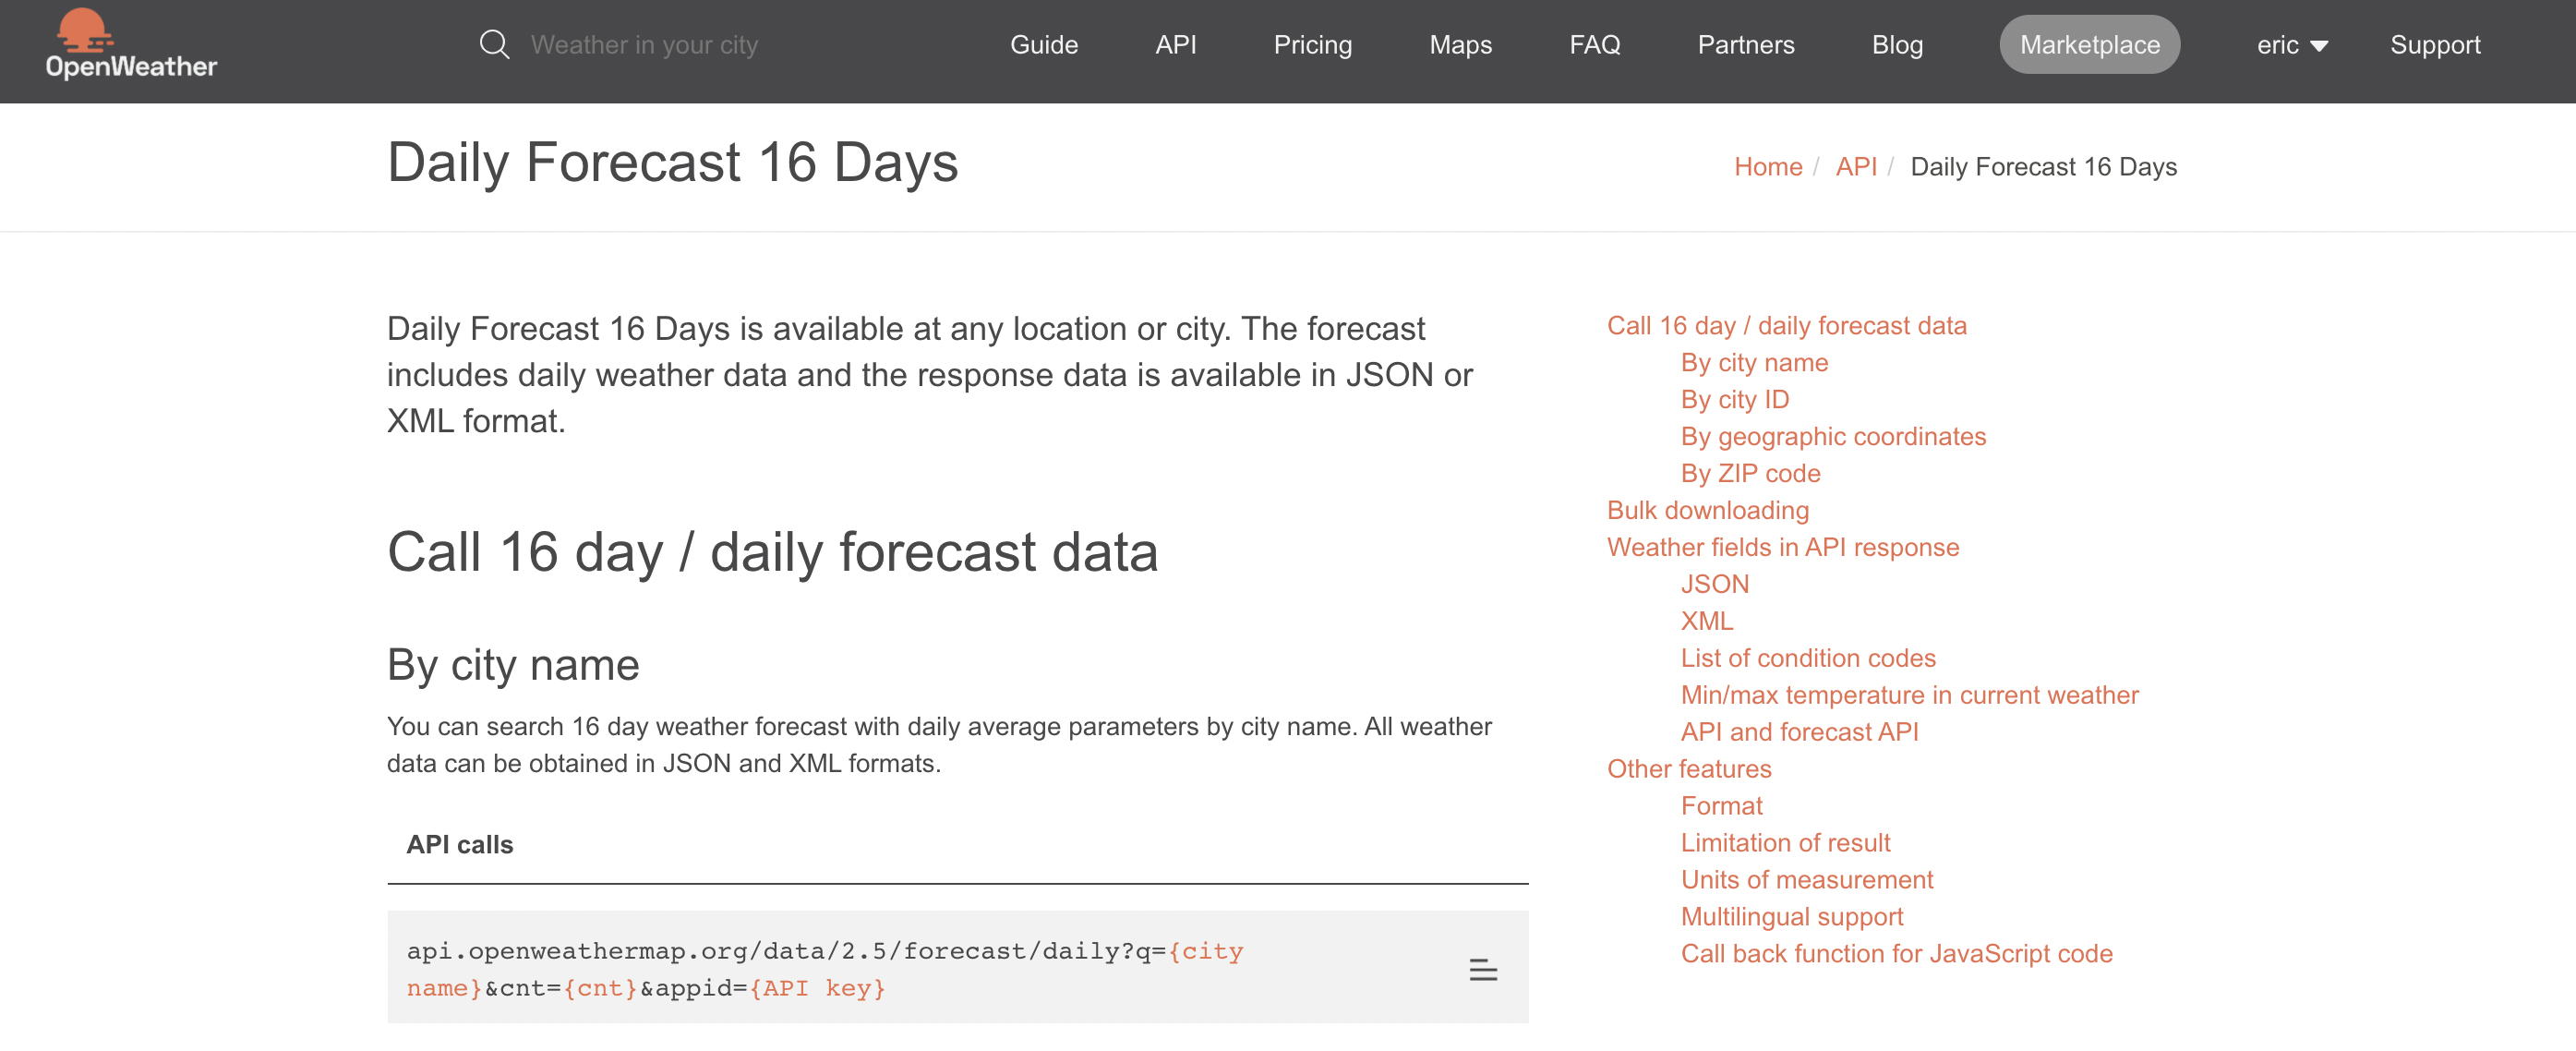
Connect to the Daily Forecast API

The objective is to display in the application the forecasts for the next few days in the form of a horizontal table.
OpenWeather offers a dedicated API: Daily Forecast.
Insert a new HTTP component in your foreground and open the Properties window.
In the URL field, insert :
https://api.openweathermap.org/data/2.5/forecast/daily

from the OpenWeather technical documentation:

Customize the other Query Strings fields (lang, units, q, appid). You can use the same App ID as for the other API.

Test the connection to the API

Click the Edit button of the HTTP component (or double-click the visible field of the HTTP component).
Information appears.
Click the Test Reques t button.
View the results of your request: if the raw data matches your request, the API has been correctly configured.
Here is an example of an answer from this API :
{
   "city":{
      "id":2643743,
      "name":"London",
      "coord":{
         "lon":-0.1258,
         "lat":51.5085
      },
      "country":"GB",
      "population":0,
      "timezone":3600
   },
   "cod":"200",
   "message":0.7809187,
   "cnt":7,
   "list":[
      {
         "dt":1568977200,
         "sunrise":1568958164,
         "sunset":1569002733,
         "temp":{
            "day":293.79,
            "min":288.85,
            "max":294.47,
            "night":288.85,
            "eve":290.44,
            "morn":293.79
         },
         "feels_like":{
            "day":278.87,
            "night":282.73,
            "eve":281.92,
            "morn":278.87
         },
         "pressure":1025.04,
         "humidity":42,
         "weather":[
            {
               "id":800,
               "main":"Clear",
               "description":"sky is clear",
               "icon":"01d"
            }
         ],
         "speed":4.66,
         "deg":102,
         "clouds":0,
         "pop":0.24
      },
      ....

Get the identifier

Get the identifier of this new component by double-clicking on the name.
Paste into a text field and you've got the identifier.
For example: 
HTTP -> 5ff6fe50a1914461d60007e3

5ff6fe50a1914461d60007e3 is the identifier of this second component.

Create a collection for weather forecasts

Inside, insert a Group (a container) that contains an example of a weather thumbnail. This container will be duplicated from the API data.
Insert a text block for the date, an image (whose source can be empty) and a text block for the minimum and maximum temperature.
In the Component Properties window, fill in the source:
[data:5ff6fe50a1914461d60007e3(/list)]
5ff6fe50a1914461d60007e3 is the identifier of the component
list is the way to access all results
Connect each element to the data source, i.e. the API.
For example, select the date.
In the Properties window, click the Dynamic Data icon in the upper right corner and the Add button.

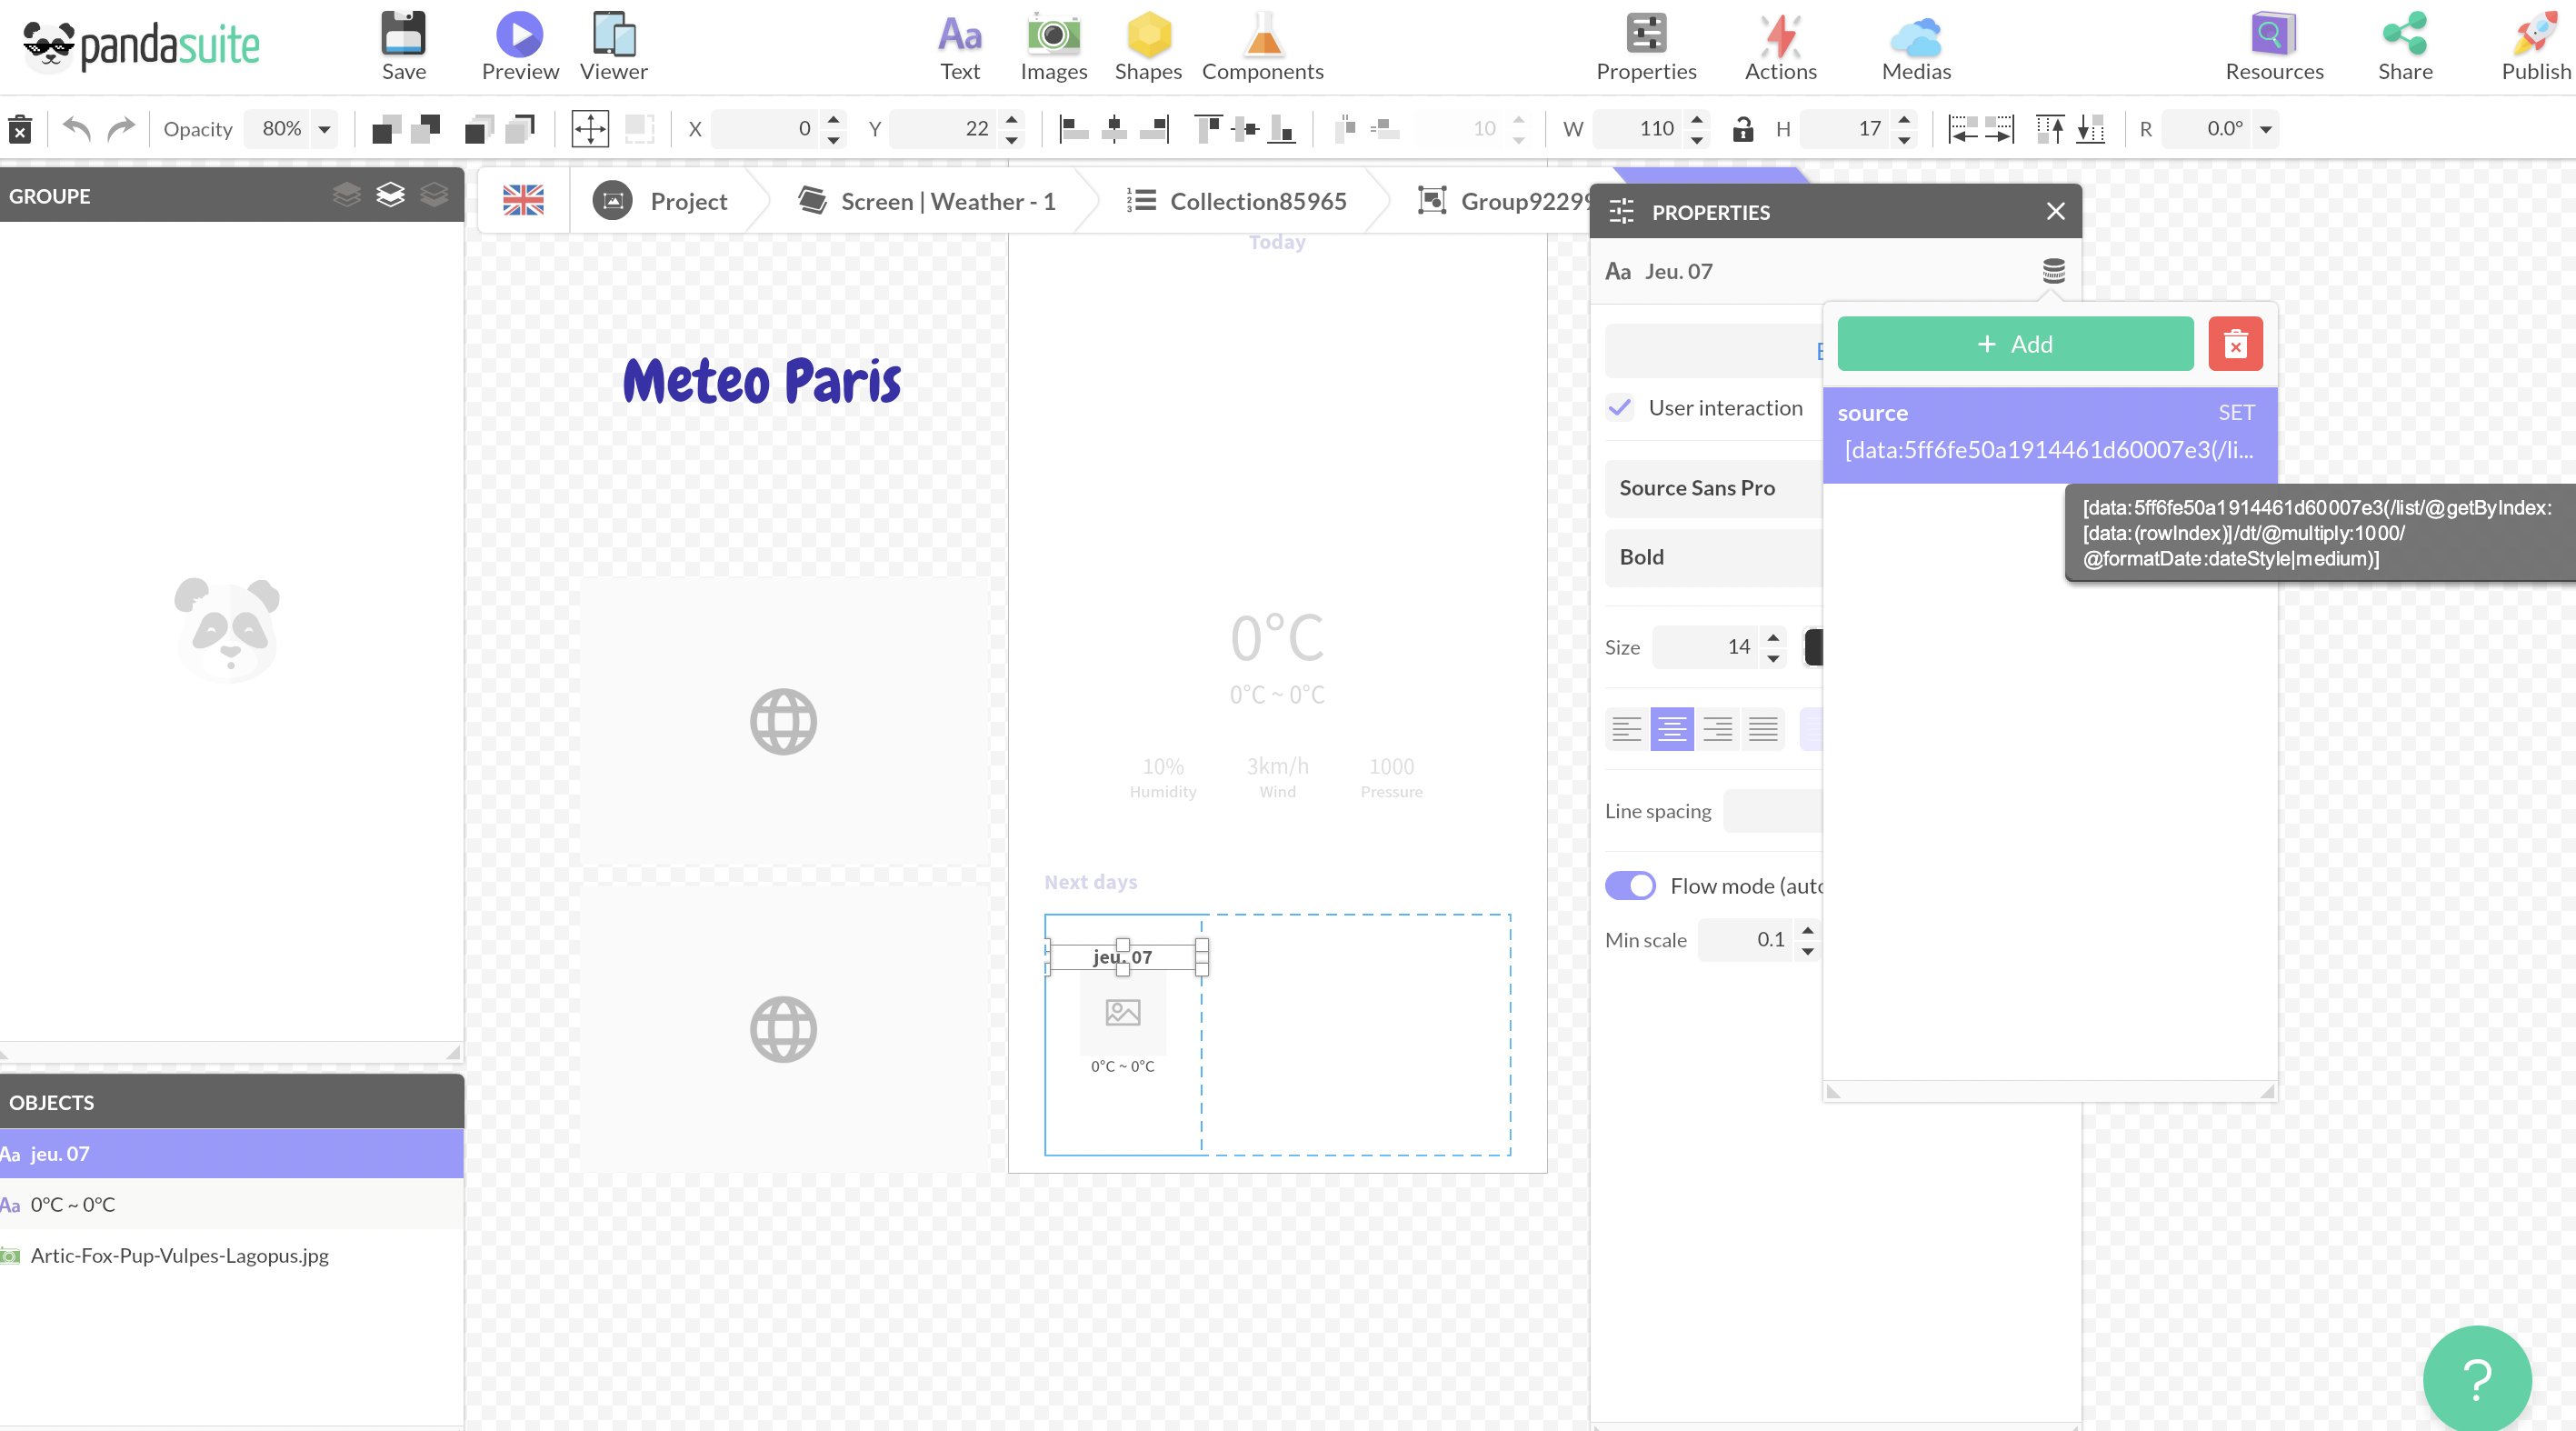
Copy and paste the following formula where 5ff6e0e1a1914461d600062a is the identifier of your HTTP component:

[data:5ff6fe50a1914461d60007e3(/list/@getByIndex:[data:(rowIndex)]/dt/@multiply:1000/@formatDate:dateStyle|medium)]

To learn more about the functions, read this tutorial.

Did this answer your question? Thanks for the feedback There was a problem submitting your feedback. Please try again later.