Send SMS via Twilio
In this tutorial, we will explain how to send an SMS from your application to a phone number specified by the user, using Twilio.
Twilio is a service that allows you to send and receive SMS and voice calls. The goal of this tutorial is to send an SMS to a customizable phone number and to open a pop-up when the message is gone.
Requirements:
-
-
Have a
Zapier account or an
Integromat account to create your scenario and connect your PandaSuite application to these services. Please note that the use of these services may incur additional costs.

Add input field
Insert the Text input component
Click on
Components and add the
Text Input component to your screen.

Customize the appearance of this field from the
Properties window.
Uncheck Live Validation so that changes to the number are not automatically taken into account.
Create button
Insert a validation button.
The purpose of this button is to validate the number entered, clear the field and send the phone number to Twilio via Integromat or Zapier :
- To validate the number entry and clear the field entry, select the button and create two actions on the Text input component: Validate Entry and Clear Text.
- To send the number to Twilio, you must first prepare the scenario on Integromat / Zapier and then insert an HTTP component to make the connection.

This configuration requires a new scenario to be set up on Integromat or Zapier. This information will be essential to build the request of our HTTP component.
💡 Integromat and Zapier are powerful and well-known services for connecting applications to each other through the use of their API. They allow to automate processes and to make advanced manipulations accessible without any line of code. In our example, they provide the connection between your application's interface (PandaSuite) and an SMS sending feature (Twilio).
You can use either one or the other in your configuration, we detail both ways. The first step is to create a webhook for each of these services.
Create the scenario via Integromat
Create a webhook
Go to https://www.integromat.com/.
Create an account, then create a new scenario.
Select
Webhooks and click the
Continue button.

In the Triggers list, select Custom webhook:

Then click on the
Add button to define a new webhook.

In the window, you can customize the name of the webhook and click on
Save.

Back in the previous window, you will see the Integromat webhook URL that you can copy to your clipboard. It looks like this:
https://hook.integromat.com/iduhiohdzoudzouopdupdz
You will need it to configure your HTTP module in PandaSuite.

Insert the HTTP component
Back to PandaSuite Studio. Click on
Components and insert an
HTTP component.
In the
Properties window, insert the URL of the webhook in the
URL field.

Choose as
POST method: this method is used to send data (here, the phone number).
Click on the
Edit Content button and enter the value you typed in the Text Input component. We have used
tel as an example but you can change the structure as you wish.
tel:[data:ID_TEXT_INPUT(/inputValue)]
To get the component ID (ID_TEXT_INPUT), double-click on the component name in the Properties window and paste the resulting formula.

Send the number to Twilio
Select the button and create a new action >
Interact with a component >
HTTP >
Start request.

Launch the web preview and click on the button to run the query once.
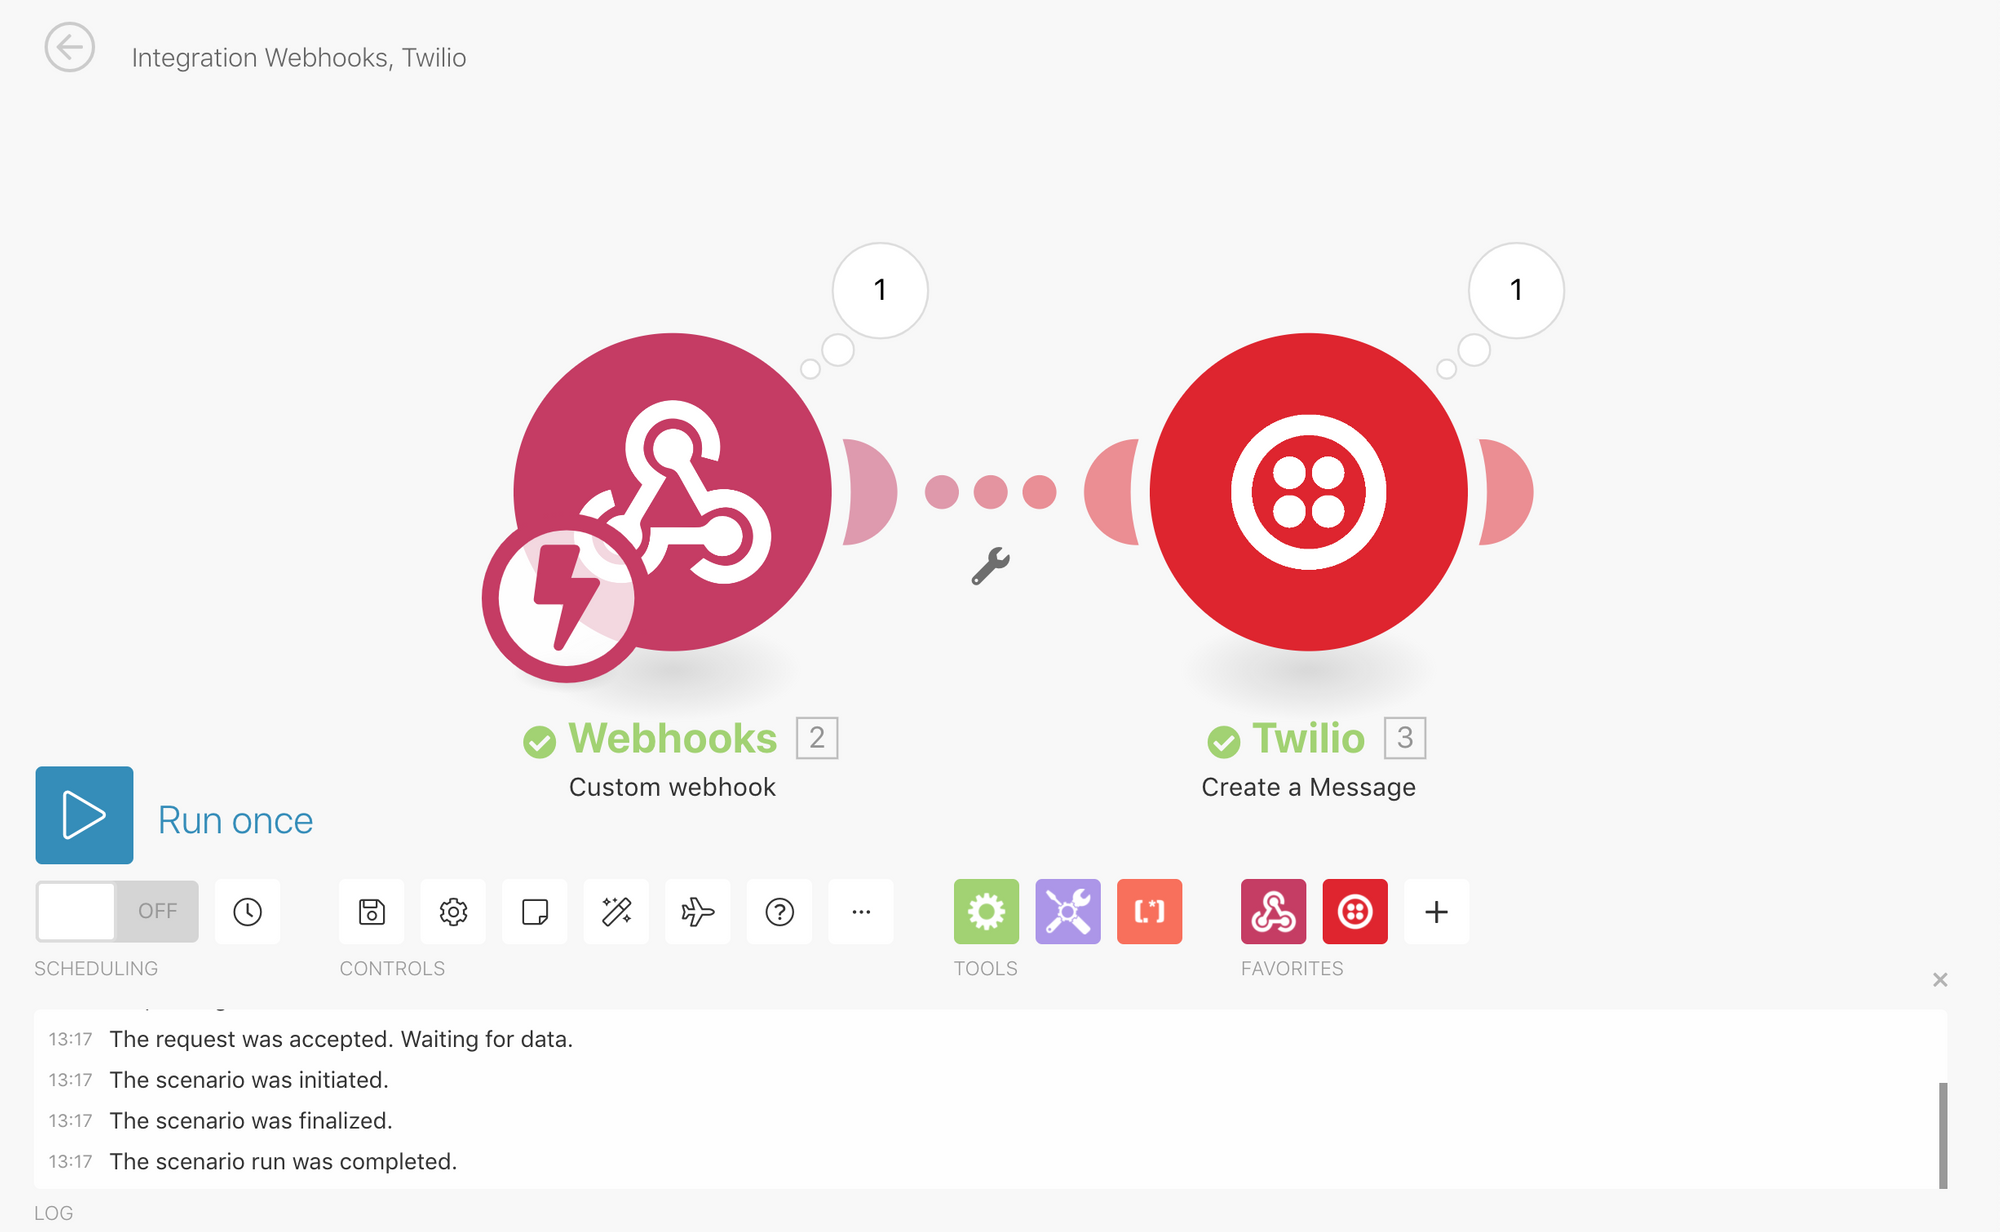
Finalize the scenario
Now that you have made an initial query, Integromat can determine the new structure.
Back in your Integromat scenario, a message appears:
Successfully determined

You can now add a new Twilio module to create a message. Click on
Add another module and select
Twilio.
In the list of messages, choose
Create a Message.

Choose the type of message you want to send:
Send a message from phone number. A sender phone number is automatically generated.

In the
To field, you find here the value of the phone number sent from the Text Input component.
In the
Body field, enter the body of the text.

Click
OK to validate your scenario.
Test it and here is the result:

Create the scenario via Zapier
Create a webhook
Go to https://zapier.com/
Create an account, then click the
Make a Zap button.
In the list of triggers, look for
Webhooks by Zapier.

In the Trigger Event list, select Catch Hook and click Continue.

You discover the URL of the Zapier webhook that you can copy to your clipboard. It looks like this:
https://hooks.zapier.com/hooks/catch/1727973/dgiudgui/
You will need it to configure your HTTP module in PandaSuite.


Insert the HTTP component
Back to PandaSuite Studio. Click on
Components and insert an
HTTP component.
In the
Properties window, insert the URL of the webhook in the
URL field.

Choose as
POST method: this method is used to send data (here, the phone number).
Click on the
Edit Content button and enter the value you typed in the Text Input component. We have used this as an example but you can change the structure as you wish.
tel:[data:ID_TEXT_INPUT(/inputValue)]
To get the component ID (ID_TEXT_INPUT), double-click on the component name in the Properties window and paste the resulting formula.
Run the query & test
Select the button and create a new action >
Interact with a component >
HTTP >
Start request.
Launch the web preview and click on the button to run the query once.
Finalise the scenario
Now that you have made an initial request, Zapier can determine the new structure.
Back in your Zapier scenario, a message appears:
We found a request

You can now configure a new action. Type and select
Twilio.
In the Action Event list, choose
Send SMS.

A sender telephone number is automatically generated.
In the
To field, you will find the value of the phone number sent from the
Text Input component.

Enter the body text in
Message.

Test it and here is the result:
Open a pop-up after sending the SMS
In our example, we want to inform the user that his SMS has been sent via a pop-up. In concrete terms it is possible to trigger an action when the HTTP request is completed.
Create the pop-up.

Select the HTTP component and the trigger event:
Request completed. Select the
Interact with a component >
Pop-up >
Open pop-up action.


